Workplaces, quantities, and overrides
Record which workplaces store a product, how much you keep there, and correct the values NextSDS derived from the SDS.
Three sections answer the question an inspector asks first: what do you hold, where, and how much.
Assign the product to workplaces
Open the Workplaces section and select Workplace. Your team's workplaces appear as a tree: expand a site to reach the workplaces inside it, tick as many as you need across different sites, then select Add. Search by name when the tree is long.
Workplaces already assigned to this product are left out, so what the tree offers is what you can still add. Select Create to make a new workplace and choose the site it belongs to.
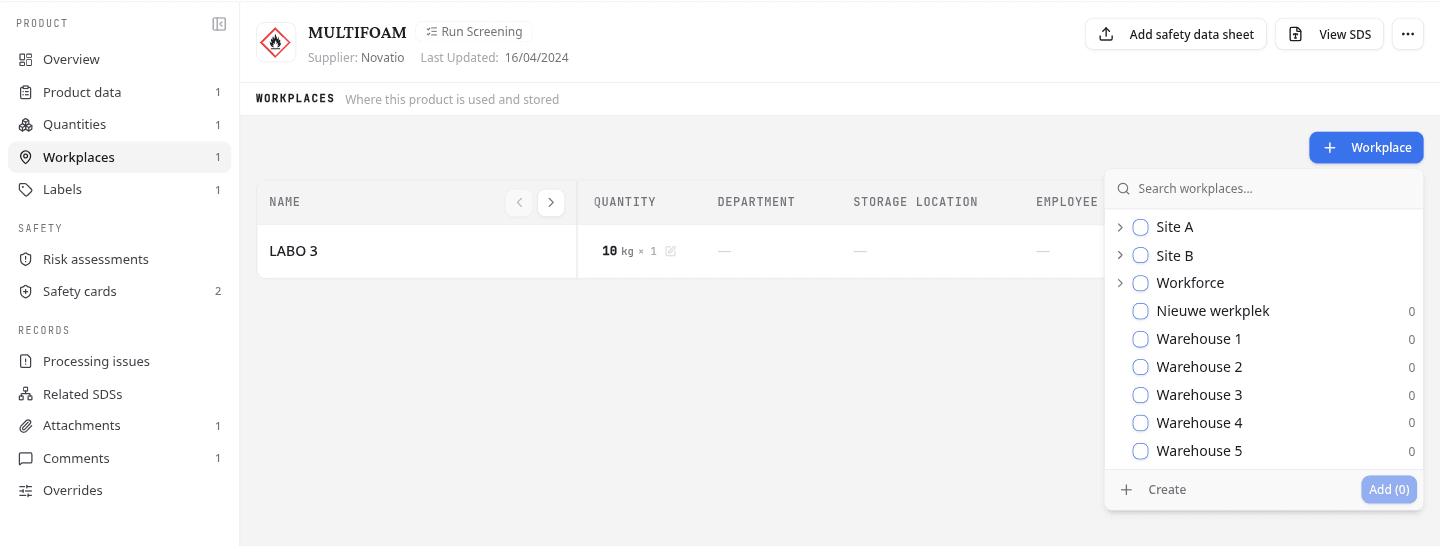
Each row records the details for one workplace: a reference quantity, Department, Storage location, Employee roles and General usage. Select Edit to fill them in, and the quantity chip to change the amount held there.
The quantity on this row is a single reference value. For stock spread across several package sizes, use the Quantities section instead.
Remove also deletes that workplace's inventory details and any RECESS or EMKG assessments recorded there. This cannot be undone.
Track stored quantities
Open the Quantities section. Each row is one storage entry: the workplace, the Amount, its Unit, the Number of packages, and the Recipient, which is the packaging it comes in.
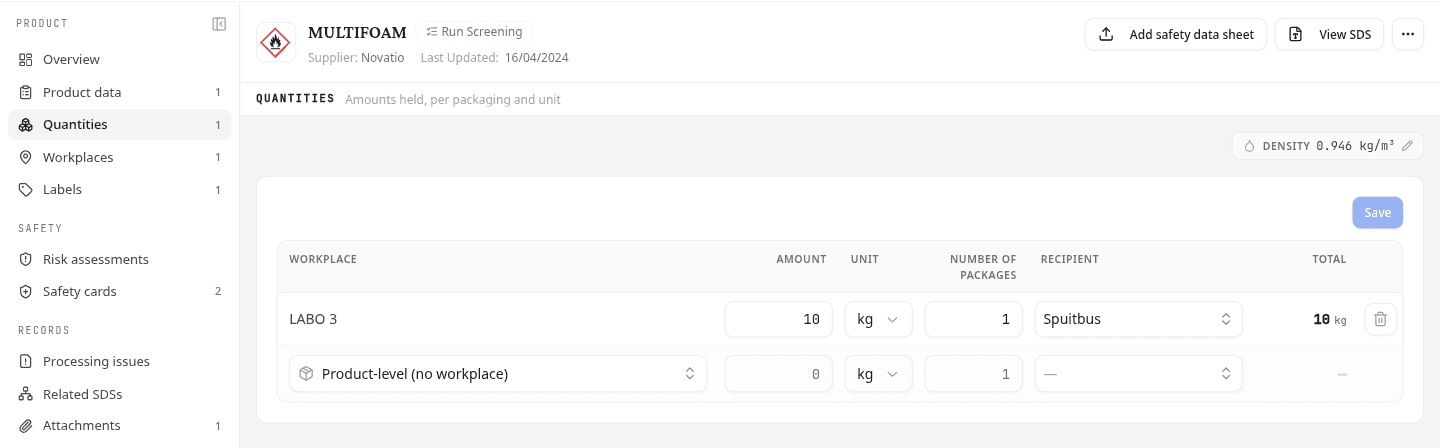
NextSDS multiplies the amount by the package count for the row's Total. Choose Product-level (no workplace) for stock you hold without tying it to one place. Fill in the last row and a new blank one appears, then select Save.
The Density pill shows the value NextSDS uses for VLAREM calculations. Select its pencil to correct it.
Check the assessments per workplace
The Risk assessments section lists every workplace that holds this product, with its latest RECESS score, its EMKG result, and Last assessed. A workplace with no assessment yet still appears, with a dash in place of a result.
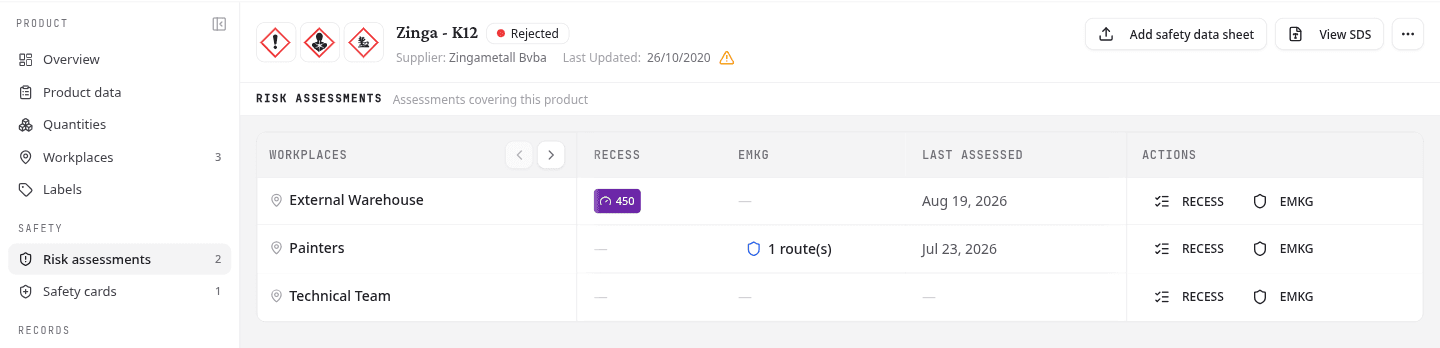
Each row carries a RECESS and an EMKG button that starts that assessment for the product at that workplace. Both are disabled when the product has no sheet NextSDS could read, because both grade from the sheet's own data. See Risk assessments.
Correct SDS-derived values
Open the Overrides section. It holds the two values you can set in place of what NextSDS read from the sheet, and counts how many are active.
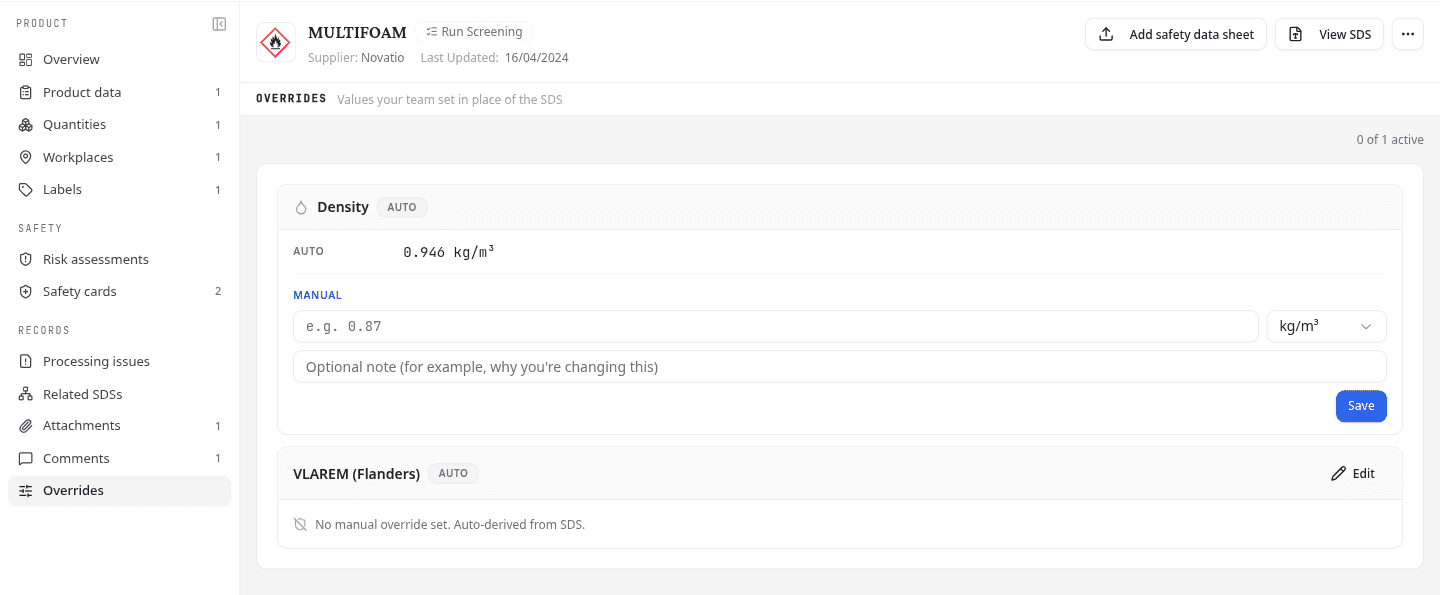
For density, enter a value under Manual, choose a unit (kg/L, g/cm³, g/mL or kg/m³), and select Save. Add a note if a colleague will need to know why you changed it. Reset to automatic returns to the SDS-derived value.
VLAREM (Flanders) works the same way. When the sheet does not give NextSDS enough detail to classify the product, select Edit to choose the storage-permit categories by hand.
An Auto badge means NextSDS still derives the value from the sheet. A Manual badge means someone on your team set it.
What to do next
With quantities recorded, check your VLAREM permitted situation against them.