Set up and organise your workplaces
Create workplaces that represent your physical locations, worker profiles, or work processes, then organise them into folders for structured chemical inventory management.
Register every area, worker profile, or process where chemicals are used so you can track inventory, run risk assessments, and generate compliance reports per workplace. Each workplace holds its own inventory of products and assessment data.
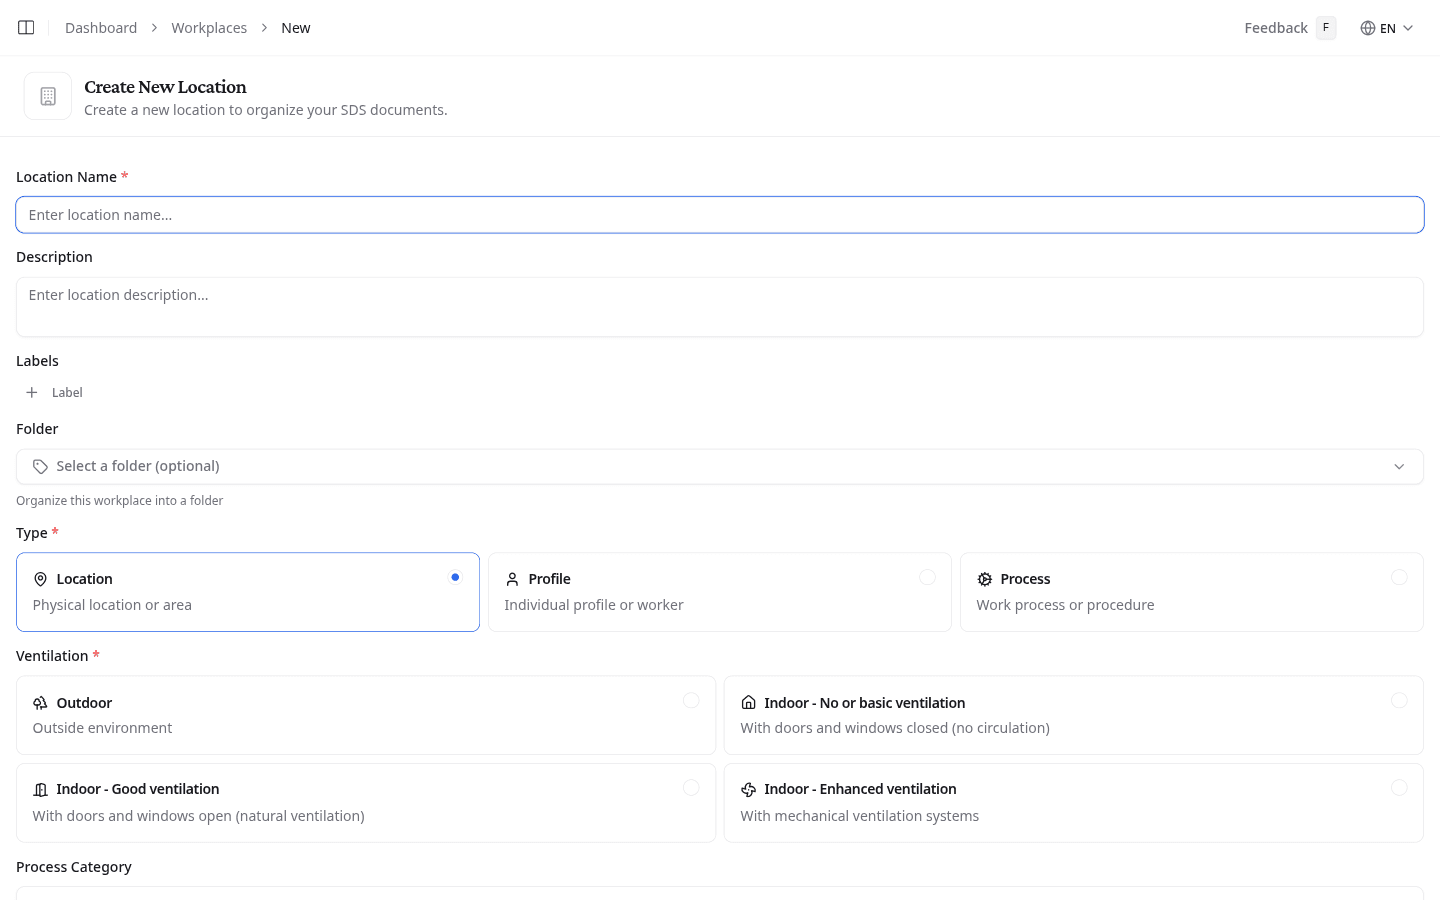
Create a workplace
- Select Create Workplace.
- Enter a Location Name and optionally a Description.
- Select a Type:
- Location: a physical area (warehouse, lab, production line)
- Profile: an individual worker exposed to chemicals
- Process: a work process or procedure involving chemicals
- Select the Ventilation level (required for Location type):
- Outdoor
- Indoor: No or basic ventilation
- Indoor: Good ventilation
- Indoor: Enhanced ventilation (mechanical systems)
- Optionally assign a Folder to place the workplace in your hierarchy, choose a Process Category (PROC1–PROC25), and add Tags.
- Select Create Workplace.
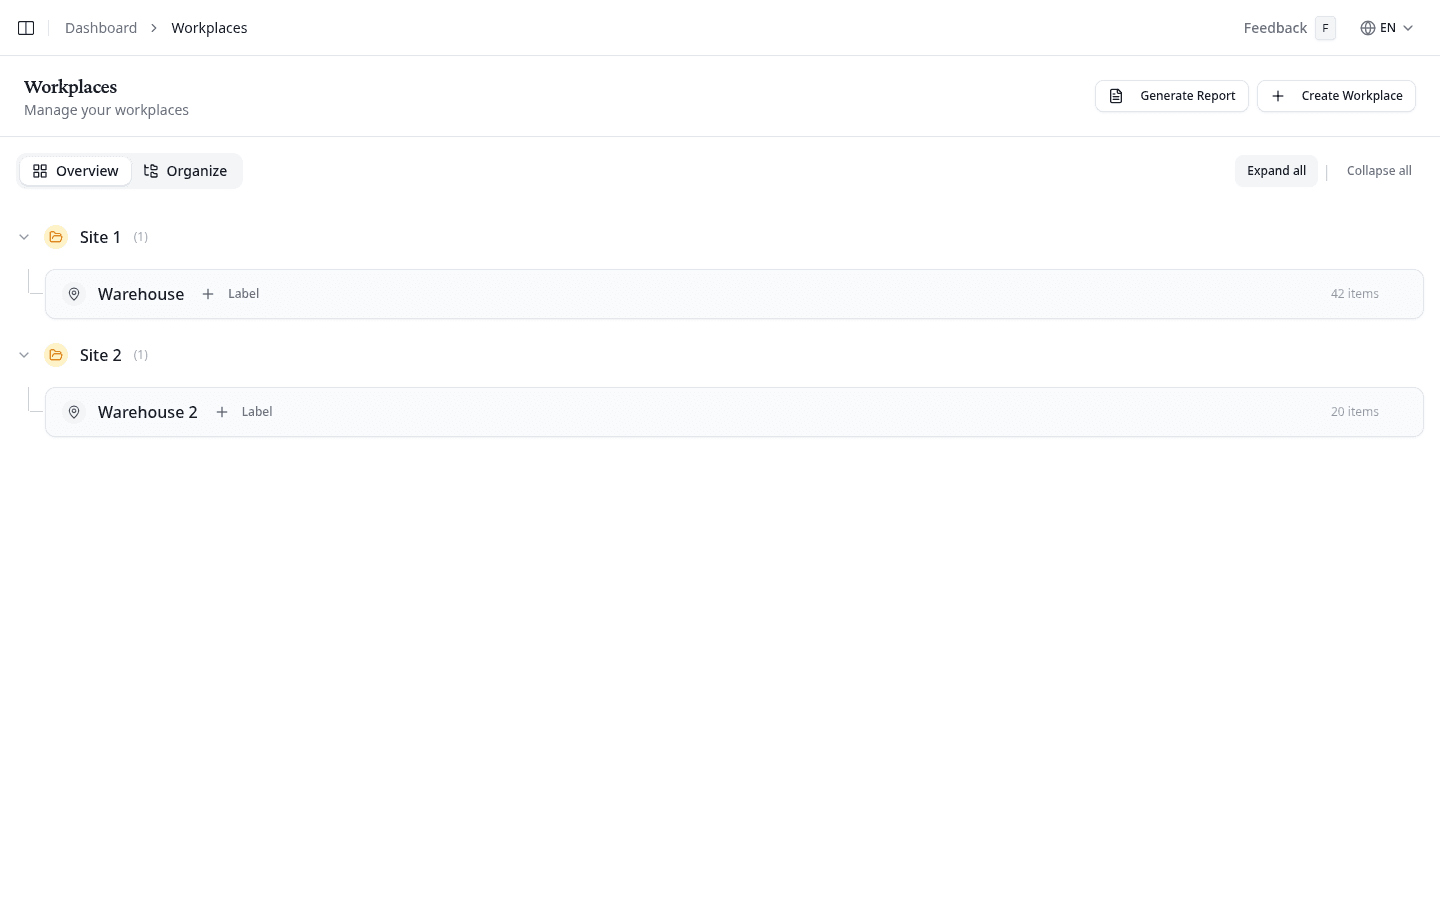
Browse workplaces
The Overview tab shows all workplaces grouped by folder. Top-level folders are expanded by default. Select Expand all or Collapse all next to the filter button to open or close all folders at once.
Each workplace card shows its name, labels, and item count. Select a workplace name to open its chemical inventory and risk assessments.
Filter by label
Select Filter and choose one or more labels to show only workplaces with those labels. Active filters appear as badges below the filter button. Select the x on any badge to remove it.
Assign labels to a workplace
Select Label next to any workplace on the Overview tab. Choose from your available workplace labels to tag the workplace. Labels help you group workplaces for reporting, for example "Production", "Warehouse", or "Office".
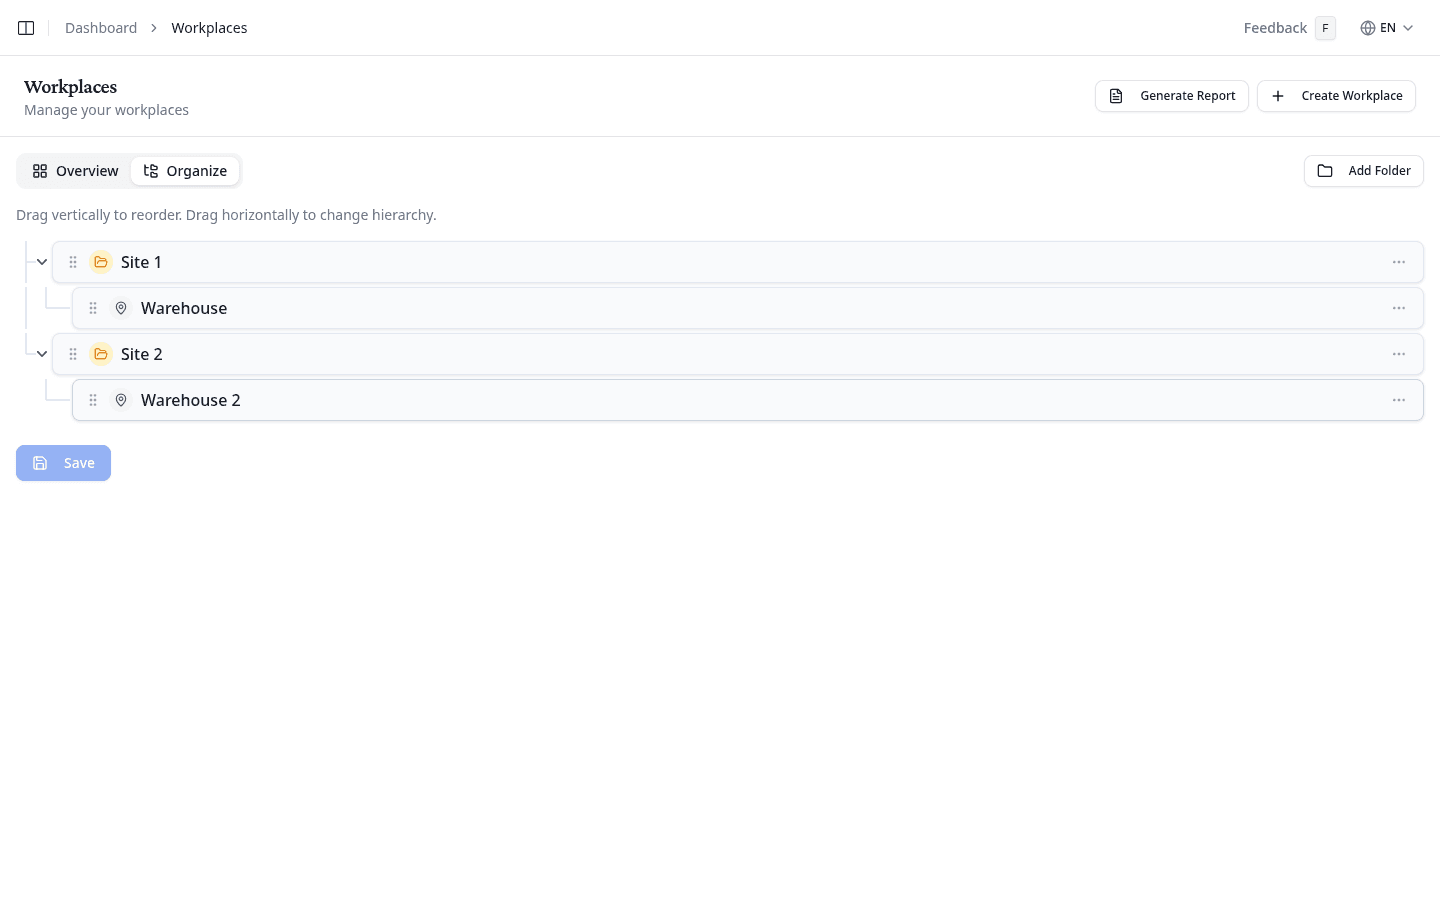
Organise workplaces into folders
Switch to the Organize tab to restructure your workplace hierarchy. Drag items vertically to reorder, or drag horizontally to nest a workplace inside a folder.

Select Add Folder to create a new grouping folder at the top level. Select Save when finished to apply your changes, or Discard changes to revert.
Edit or delete folders
Open the options menu (⋯) on any folder row to see the available actions:
- Edit: update the folder name or description
- Add Sub-folder: create a nested folder inside this one
- Delete: remove the folder permanently
Deleting a folder also deletes all sub-folders inside it and moves its workplaces to the top level.
To edit or delete a workplace, open the workplace and go to the Settings tab.
Generate a compliance report
Select Generate Report to open the inventory report generator for all workplaces.
What to do next
Open any workplace to view its chemical inventory and run risk assessments. Assign products, review storage classifications, and score each chemical using the RECESS method.