Simulate workplace exposure with ECETOC TRA
Model inhalation and dermal exposure for every component in a mixture using the ECETOC TRA 3.2 method, and compare it against occupational exposure limits.
The simulation predicts how much of each substance a worker actually takes in, then divides that by the occupational exposure limit to give a risk characterisation ratio. A ratio at or above 1 means the controls you described are not enough.
Run an exposure simulation
Open a product from your library, then select Simulate Exposure in the Manage menu.
The wizard has five stages: Select SDS, Product Setup, Use Scenario, Components and Results.
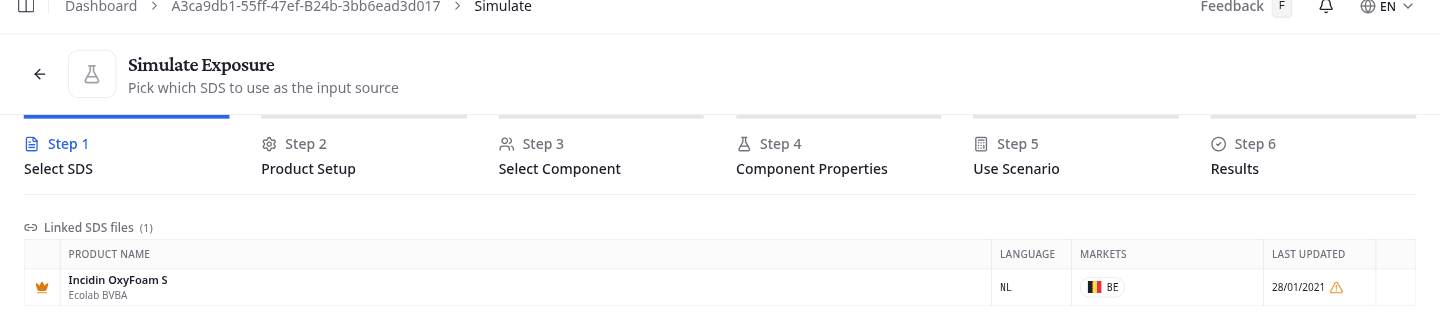
Select SDS
Pick which of the product's linked sheets to use as the source of the composition.
Product Setup
Confirm the Physical State and enter the Dilution (%). Use 100 for a product used at its supplied concentration. Both are required.
To go back and simulate from a different sheet, select Change SDS, which is what the back button reads on this step.
Use Scenario
This stage carries the assessment. Everything here describes your workplace, not the product.
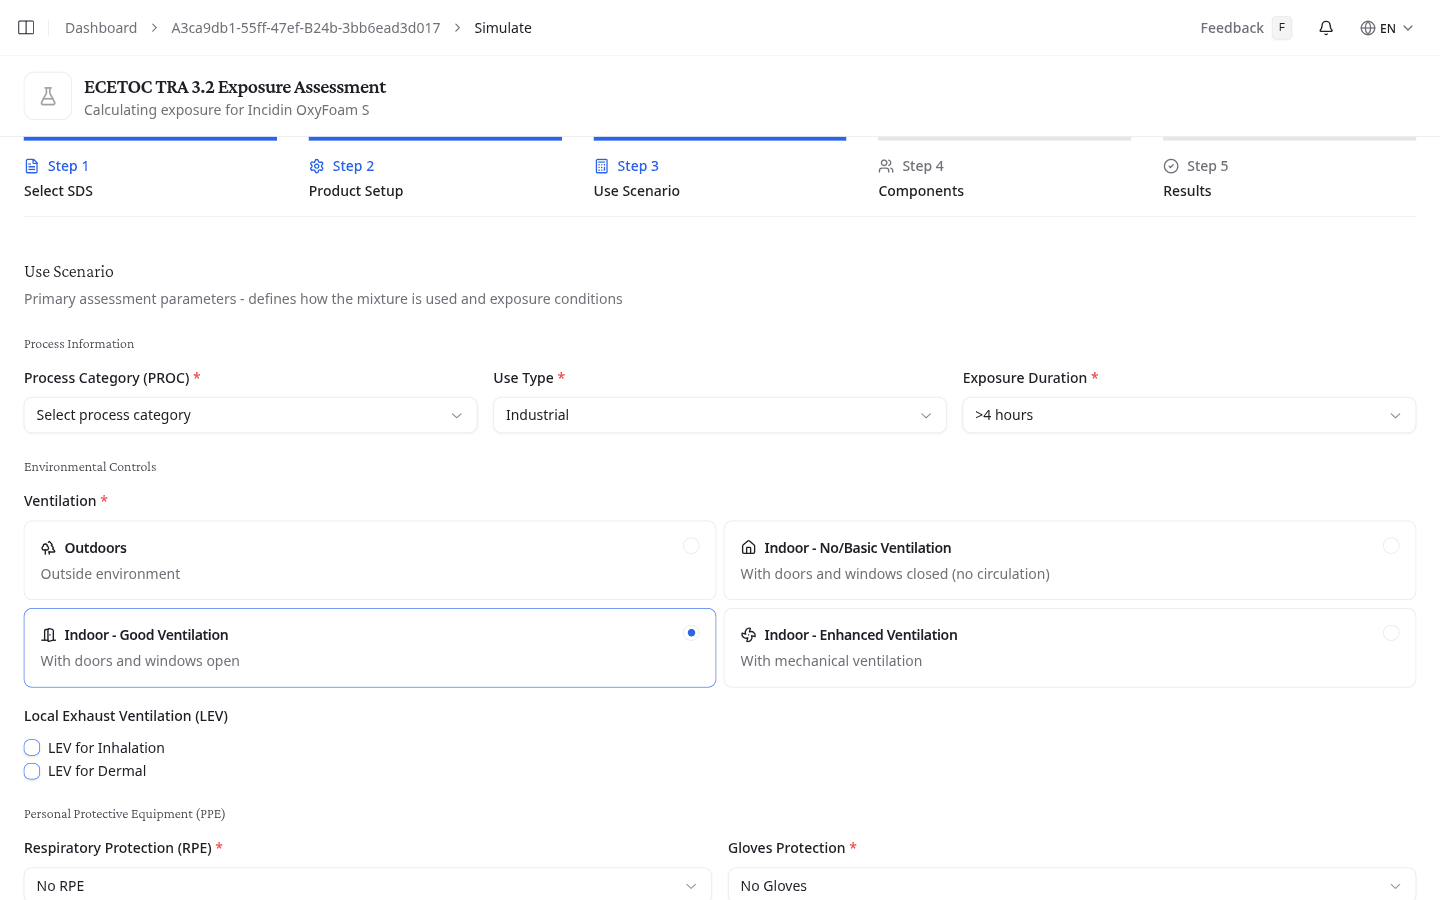
Under Process Information, pick the Process Category (PROC) that matches the task, from Use in closed process, no likelihood of exposure through to Industrial spraying. Then set Use Type to Industrial or Professional, which changes the exposure factors ECETOC TRA applies, and pick the Exposure Duration: <15 minutes, 15min - 1 hour or >4 hours. Round up where the task falls between two bands.
Under Environmental Controls, choose the Ventilation:
| Option | What it means |
|---|---|
| Outdoors | Outside environment |
| Indoor - No/Basic Ventilation | Doors and windows closed, no circulation |
| Indoor - Good Ventilation | Doors and windows open |
| Indoor - Enhanced Ventilation | Mechanical ventilation |
Under Local Exhaust Ventilation (LEV), tick LEV for Inhalation and LEV for Dermal separately, since extraction at the source often reduces one route and not the other.
Under Personal Protective Equipment (PPE), record what is actually worn:
| Control | Options |
|---|---|
| Respiratory Protection (RPE) | No RPE, RPE 90% efficiency, RPE 95% efficiency |
| Gloves Protection | No Gloves, 80% efficiency, 90% efficiency, 95% efficiency |
Every control here divides the predicted exposure, and a 95% glove takes it down twentyfold. Claim an efficiency only where the equipment is specified, fitted and actually worn for the whole task. An assumed control is how a simulation passes a scenario that would fail in practice.
Components
Every substance in the mixture is listed with its CAS number, EC number and concentration, along with the molecular weight and the number of countries NextSDS holds an exposure limit for.
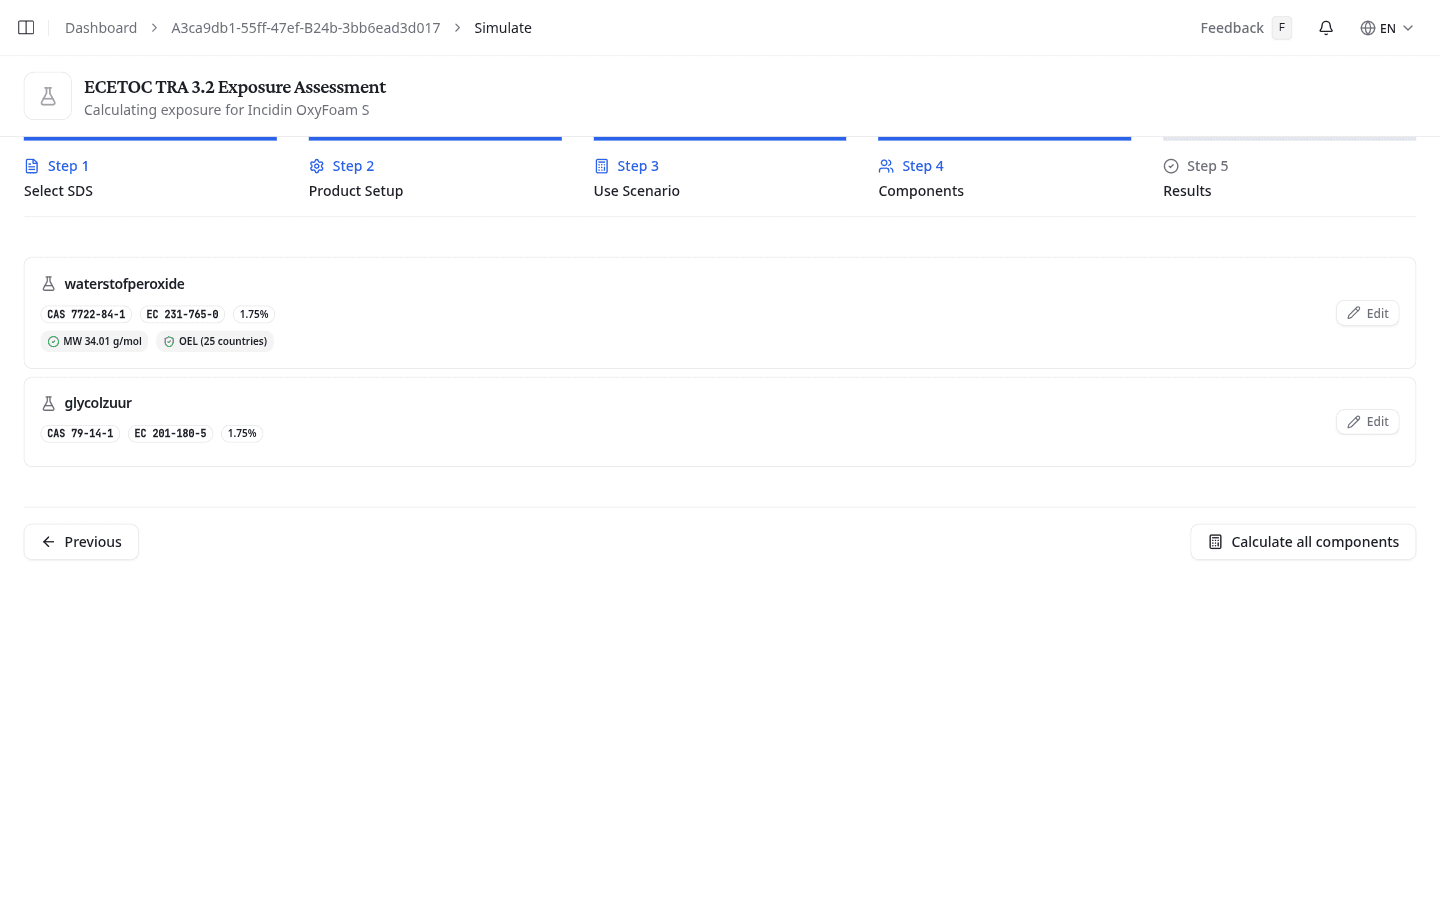
Select Edit on a component to supply what the calculation is missing. A component you have already filled in is marked Edited.
Set the Concentration Range (<1%, 1-5%, 5-25% or >25%) and confirm the component's own Physical State, which can differ from the product's. What NextSDS asks for next follows from that state:
| Physical state | What to supply |
|---|---|
| Liquid | Molecular Weight (g/mol) and Vapor Pressure (Pa). NextSDS works out fugacity from them. |
| Solid | Dustiness: Low for plastic granules and pelleted fertilisers, Medium for talc and graphite, High for cement dust, flour and plaster |
When the product is a liquid and the component is a solid, NextSDS shows Solid in Liquid Detected and sets dustiness to high, which is what ECETOC TR114 requires. Treat that result as an upper bound. The method was not built for solids in liquids, and where the task creates an aerosol, spraying for instance, only measurement will settle it.
Under Exposure Limits, enter the values to compare against. Pick a Country Reference to fill them from the limits NextSDS holds for that country, or type them yourself:
- Long-term Inhalation (mg/m³)
- Short-term Inhalation (mg/m³)
- Long-term Dermal (mg/kg/day)
- Local Dermal (µg/cm²)
A limit you leave empty produces no ratio for that route, so the sheet stays silent on it rather than reporting a pass.
Select Calculate all components to run every substance at once against the scenario you described.
Results
| Column group | What it shows |
|---|---|
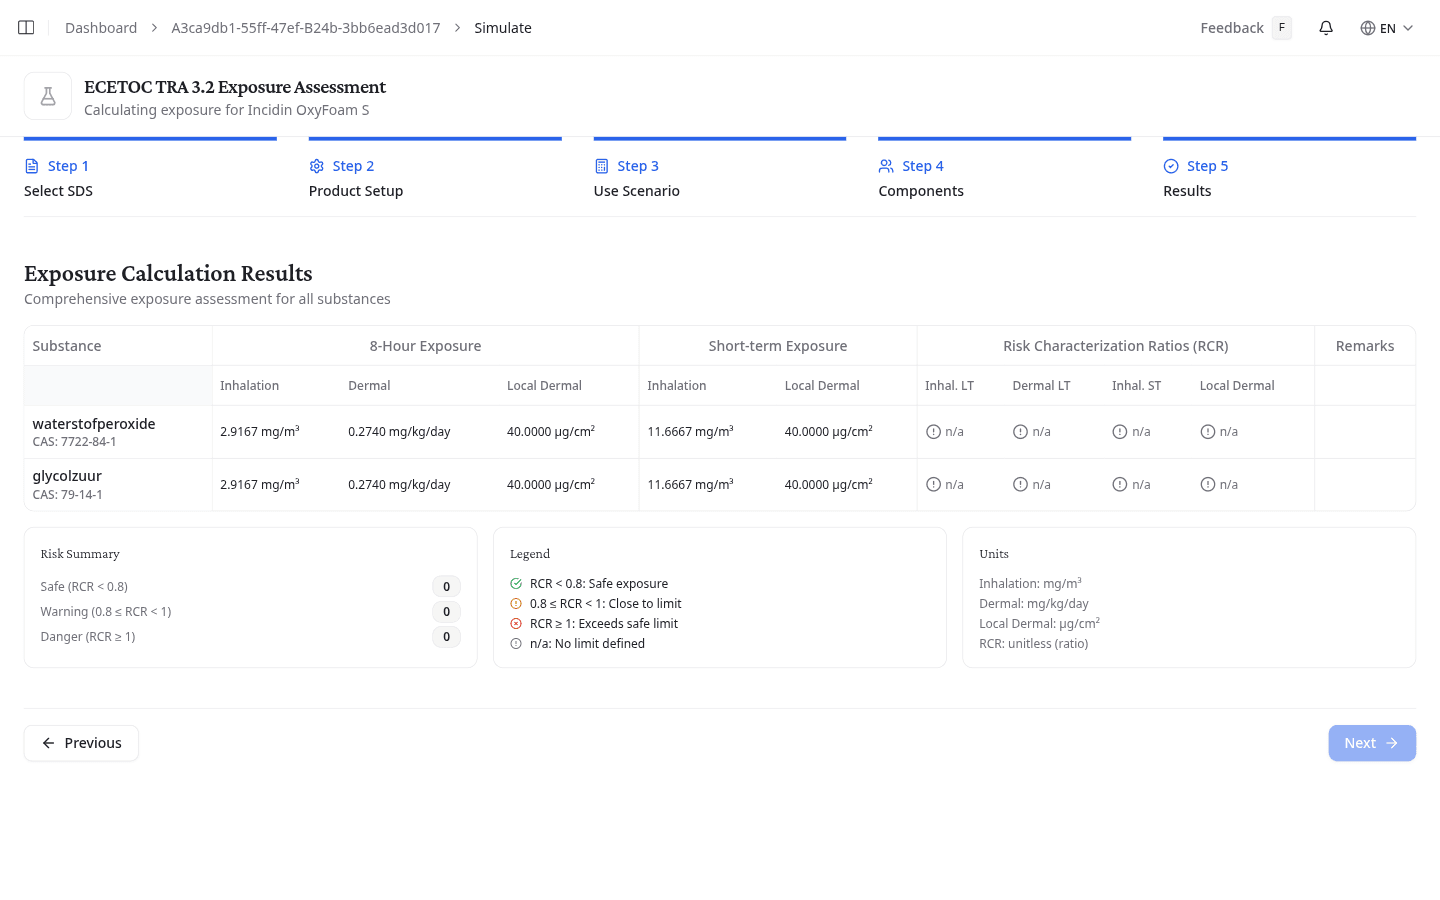
| 8-Hour Exposure | Predicted inhalation (mg/m³), dermal (mg/kg/day) and local dermal (µg/cm²) over a full shift |
| Short-term Exposure | Predicted inhalation and local dermal values for peak exposures |
| Risk Characterization Ratios (RCR) | Long-term inhalation, long-term dermal, short-term inhalation and local dermal, each as predicted exposure divided by the limit |
Risk Summary counts the ratios into three bands:
- Safe below 0.8
- Warning from 0.8 up to 1
- Danger at 1 and above, where the exposure exceeds the limit and the controls need strengthening
A ratio reads n/a where no limit is defined for that substance and route. That is not a pass. It means nothing was there to compare against, so set the limit on the component and calculate again.
What to do next
Run an EMKG risk assessment to set the control measures for the workplace.