Manage a workplace's chemical inventory
Track chemicals at a specific workplace, review dangerous goods classifications, and run risk assessments to support compliance and audit readiness.
Each workplace opens on the Overview tab. From there you can check readiness at a glance and navigate to the inventory, storage, or assessment tabs.
Check the overview
The Overview tab shows three key numbers:
- Products on site: total number of chemicals in the inventory
- Risk Assessed: how many have a completed RECESS assessment, with a progress bar
- Pending Assessment: how many still need a RECESS assessment
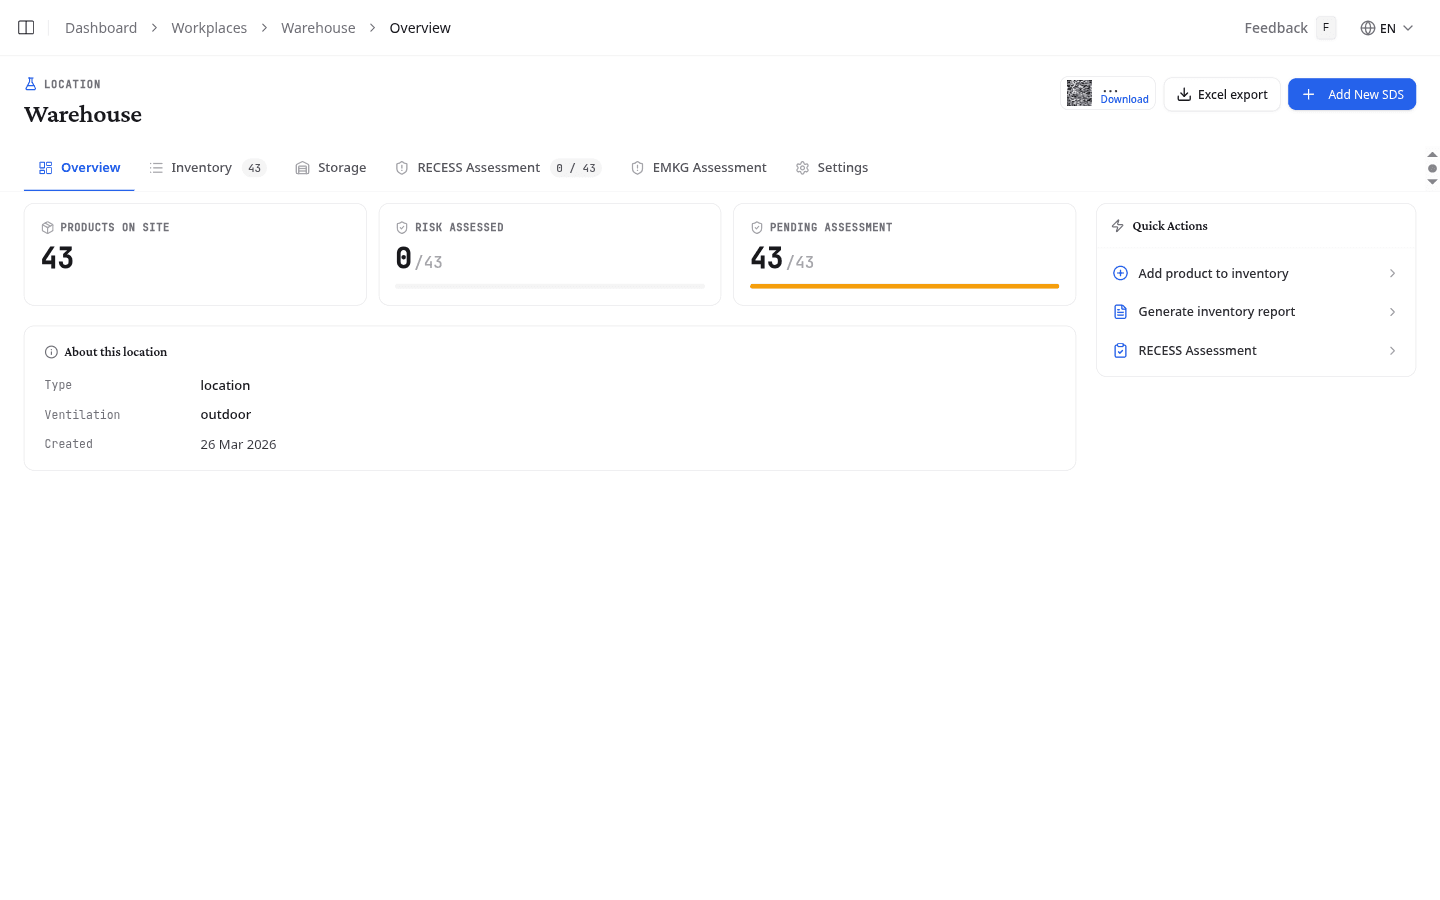
The Quick Actions panel gives direct links to add a product, generate an inventory report, or go to the RECESS Assessment tab. The About this location panel shows the type, description, process category, ventilation level, and creation date.
Add products to the inventory
Select Add New SDS in the header to add chemicals to this workplace. You can upload SDS files directly, search your existing library, or use the magic mailbox to forward SDS documents by email.
Track your chemical inventory
The Inventory tab lists every product assigned to the workplace with key safety data at a glance.
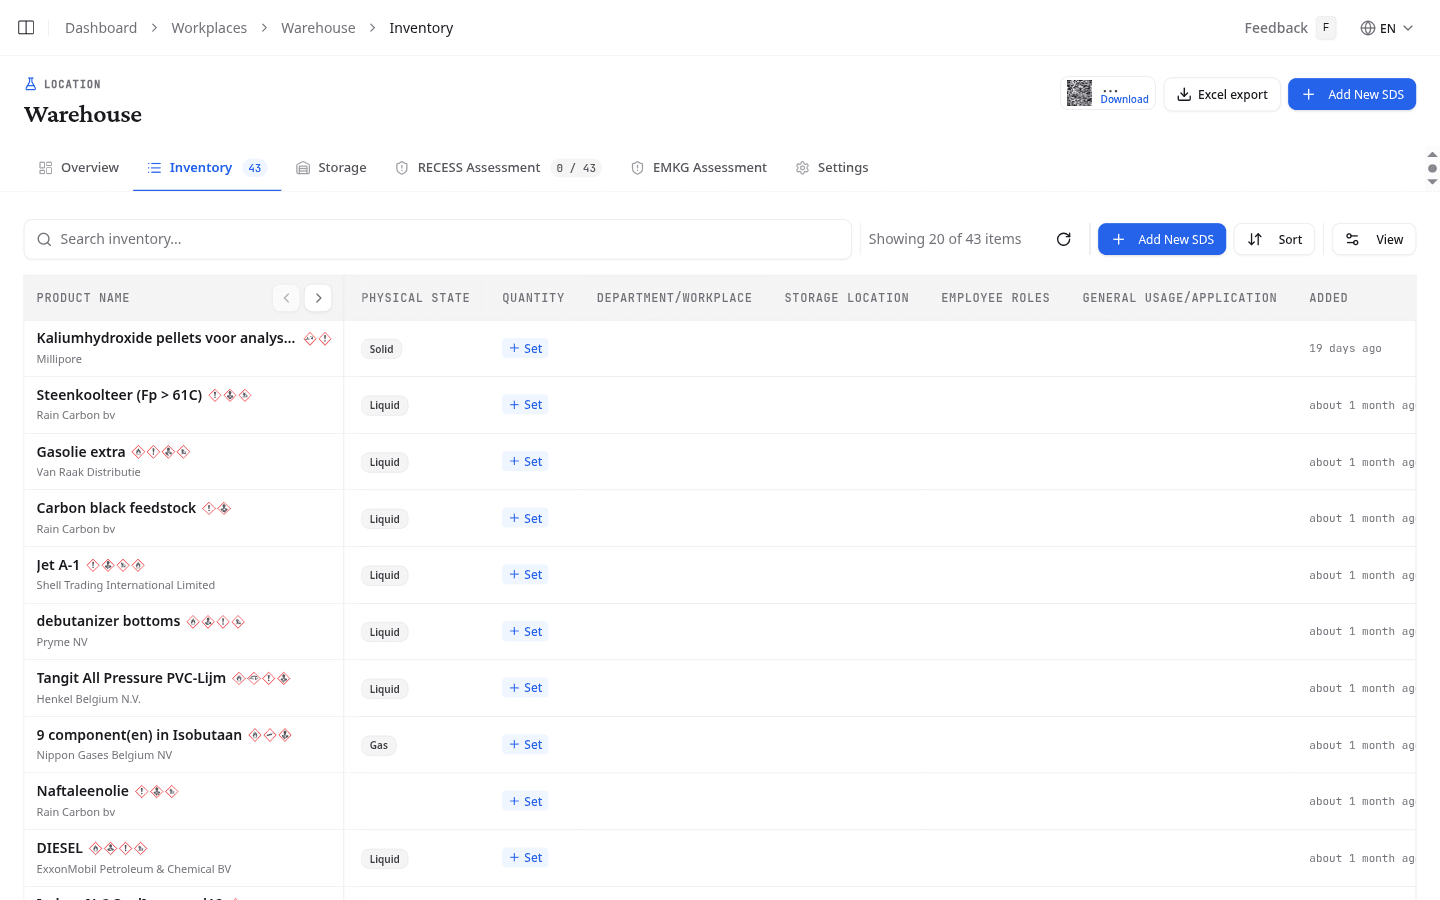
| Column | What it shows |
|---|---|
| Product name | The product's name from the SDS |
| Physical State | Liquid, solid, gas, or aerosol |
| Quantity | Amount stored at this workplace. Select Set to record the volume, unit, and number of containers |
| Department/Workplace | The department or sub-area where this product is used |
| Storage Location | Where the product is physically stored |
| Employee Roles | Roles or personnel who work with this product |
| General Usage/Application | A brief description of how the product is used |
| Added | When the product was added to the inventory |
Select any row to expand it and view full product and inventory details including storage location, department, employees, usage description, and dates. Use the Edit and Remove buttons on each row to update inventory details or remove a product from the workplace.
Review storage data
The Storage tab lists every chemical with its dangerous goods classification, permit requirements, density, and recorded quantity.
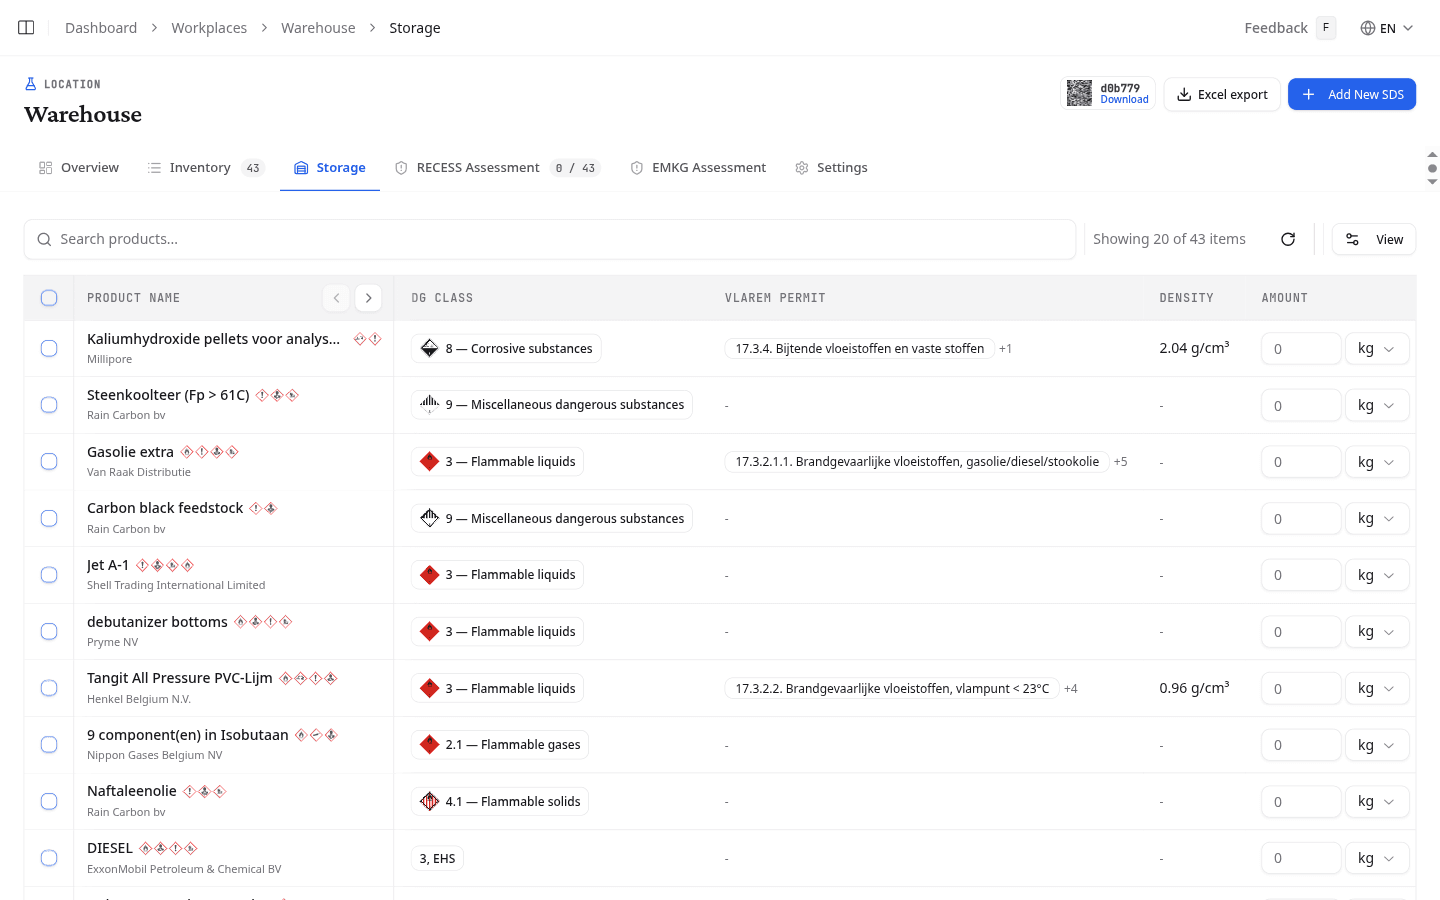
| Column | What it shows |
|---|---|
| DG Class | The ADR transport class with a hazard diamond icon. For example, Class 3 (Flammable liquids) |
| VLAREM Permit | The applicable VLAREM storage permit category for Belgian environmental regulations |
| Density | Physical density from the SDS (Section 9), where available |
| Amount | Recorded quantity. Edit inline: type a value, select a unit (kg, L, lbs), and enter the number of containers |
Run a RECESS risk assessment
The RECESS Assessment tab calculates a risk score for each chemical using the formula: Risk = Effect × Exposure × Probability.
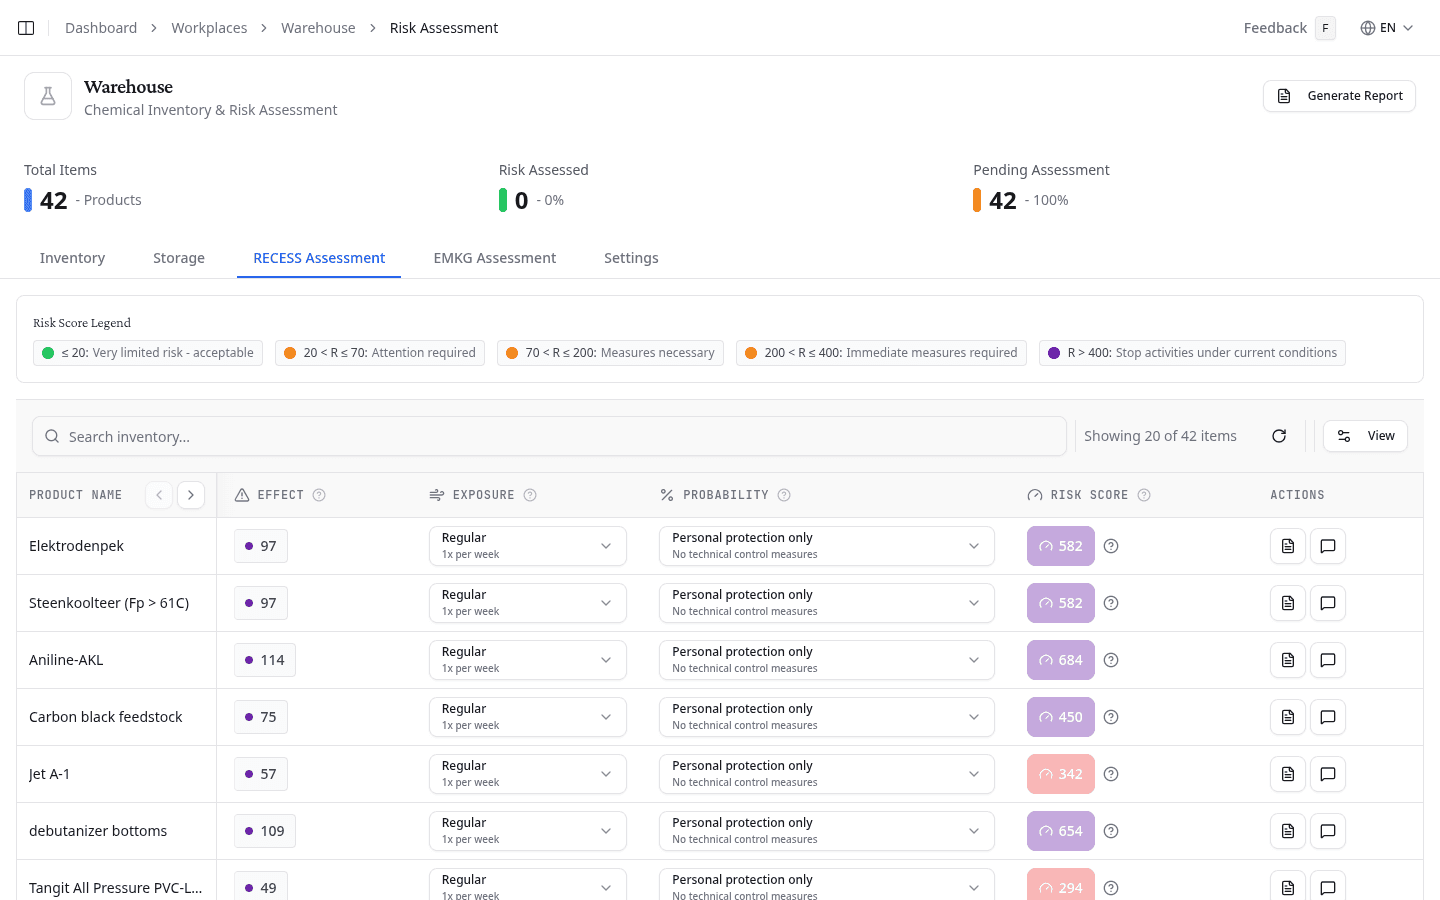
NextSDS automatically determines the Effect score from the product's hazard statements (H-codes). Set the Exposure and Probability values using the selectors in each row to match your workplace conditions. The resulting Risk Score is colour-coded by severity:
| Risk score | Meaning |
|---|---|
| ≤ 20 | Very limited risk, acceptable |
| 20 < R ≤ 70 | Attention required |
| 70 < R ≤ 200 | Measures necessary |
| 200 < R ≤ 400 | Immediate measures required |
| R > 400 | Stop activities under current conditions |
Review EMKG assessments
The EMKG Assessment tab shows the results of EMKG risk assessments saved to this workplace. Each row displays the product name, assessment status, control levels for each exposure route (inhalation, skin, eyes, fire and explosives, storage), and the date assessed.
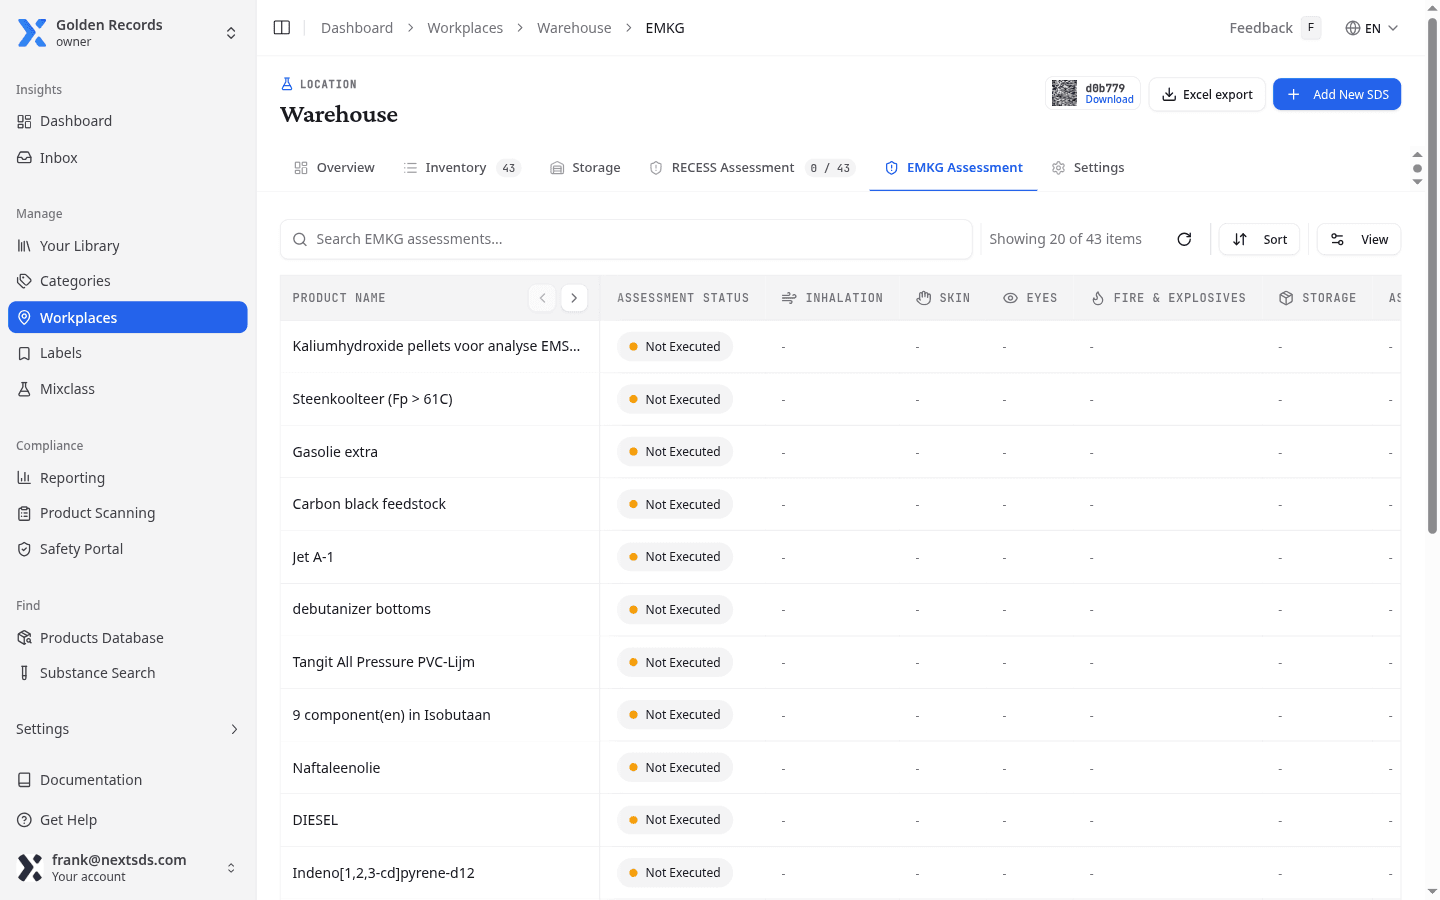
Select Not yet assessed in the toolbar to filter the list to products with no EMKG assessment recorded. This helps you identify which products still need attention.
For products showing Not Executed, select the link icon to open the EMKG wizard for that product.
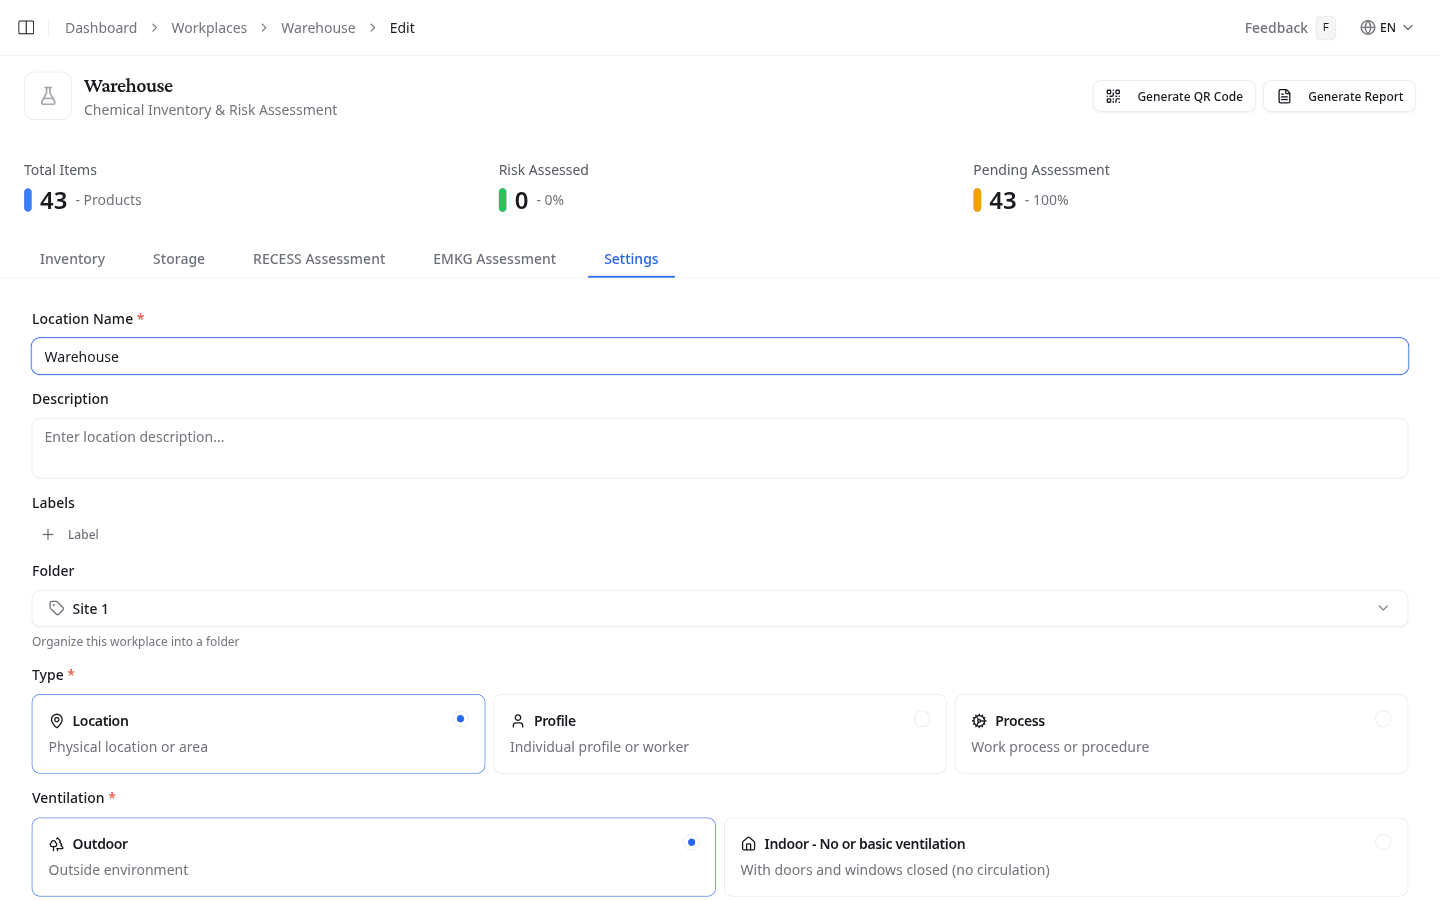
Edit workplace settings
The Settings tab lets you update the workplace name, description, type, ventilation level, and process category. Select Update location to save your changes.
Delete a workplace
Scroll to the Danger Zone at the bottom of the Settings tab and select Delete. Confirm the deletion in the pop-up window.
Deleting a workplace permanently removes it and all its inventory data. This action cannot be undone.
Generate an inventory report
Select Generate inventory report in the Quick Actions panel, or select Excel export in the page header, to open the inventory report generator pre-filtered to the current workplace.
What to do next
For products with elevated RECESS risk scores, run a detailed EMKG assessment to determine the specific control level required, from basic ventilation up to fully enclosed systems.