Manage your SDS library
Search, filter, and manage all Safety Data Sheets your team has uploaded.
Your library is the central register of every SDS document your team manages. Use it to find products, review their status, and keep your chemical inventory audit-ready.
Find a product
Type a product name, chemical name, or supplier into the Search products… field above the table. Results update as you type.
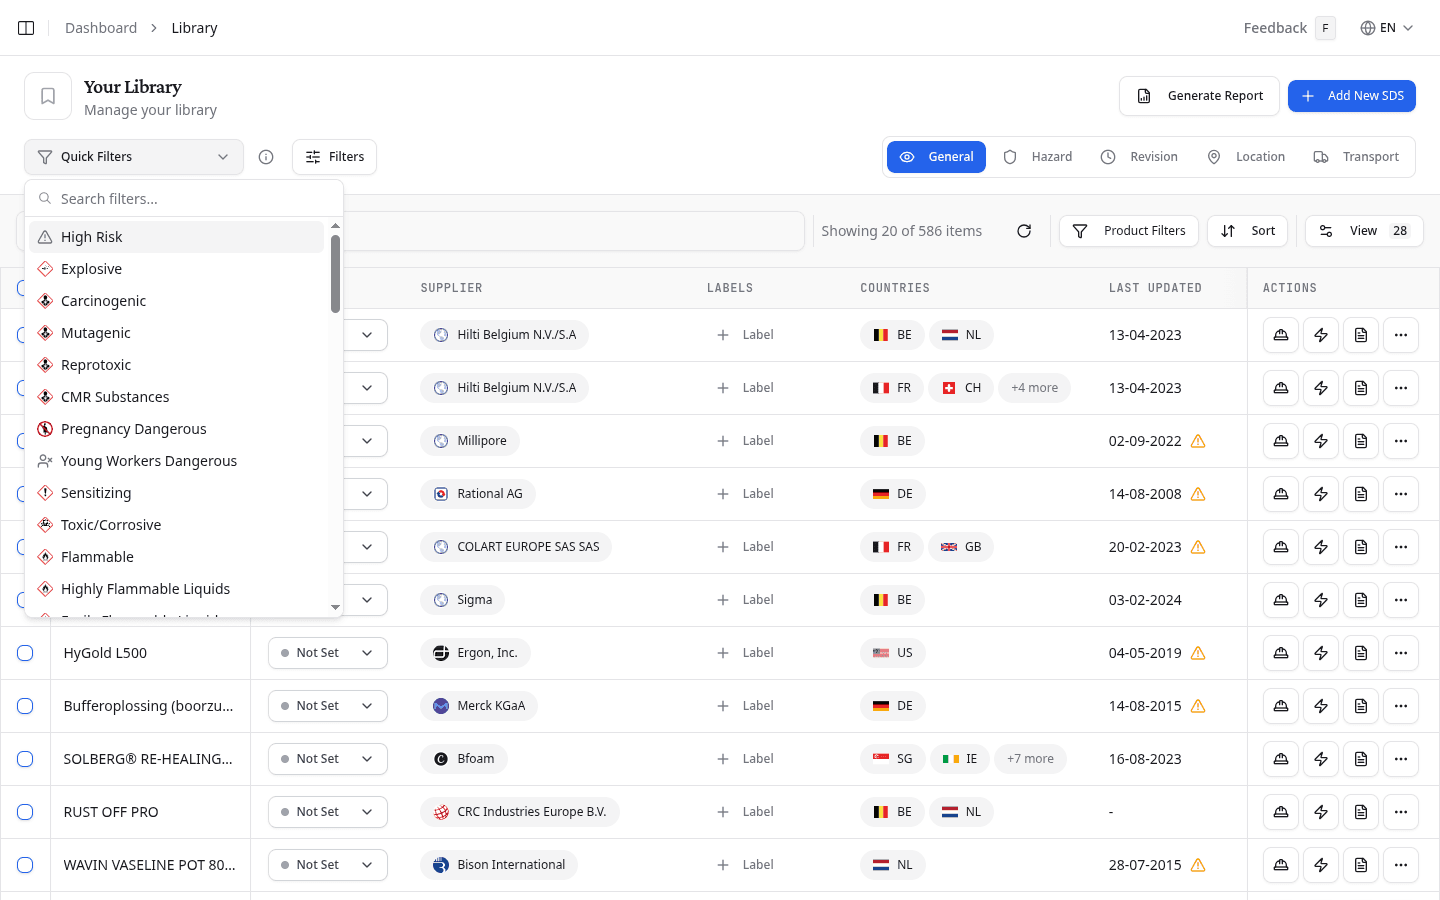
Filter your library
Quick Filters: select from predefined safety-focused filters. These cover hazard levels (Level 1 through Level 5), hazard categories (e.g. Flammable, Corrosive, CMR Substances, Skin Irritating / Allergy), PPE requirements (Respiratory Protection, Hand Protection), physical properties (Liquid State, Low Flash Point), transport status (Dangerous Goods, Marine Pollutant), document age (Less than 1 Year through Over 5 Years Old), GHS pictograms, and EMKG groups.
Filters: open the filters panel to narrow results by:
| Filter | What it does |
|---|---|
| Status | Filter by review status: Review, Accept, Reject, Not Set, Failed, or Archived |
| Locations | Show only products stored at specific workplaces. Select No Location to find products that have not been assigned to any workplace |
| Supplier | Filter by supplier name |
| Labels | Filter by labels your team has assigned |
Active filters appear as badges below the toolbar. Select the × on any badge to remove it, or select Reset Filters to clear all at once.
Build custom search filters
Select Product Filters in the table toolbar to open the custom search filters. Combine multiple conditions with "match all" or "match any" logic. Each condition targets a specific SDS field (e.g. supplier, hazard class, revision date) with an operator and value.
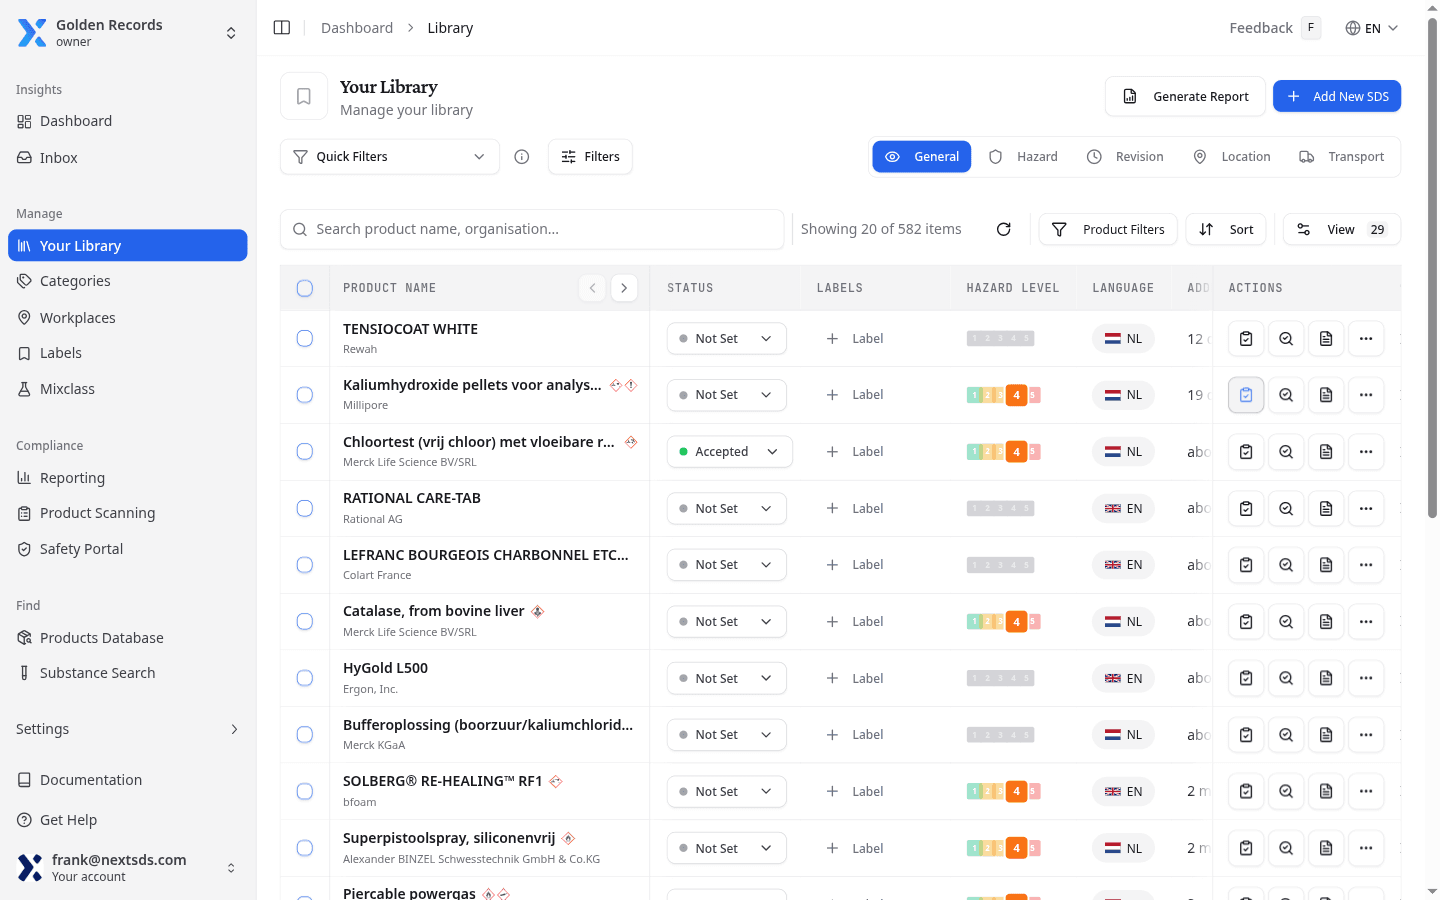
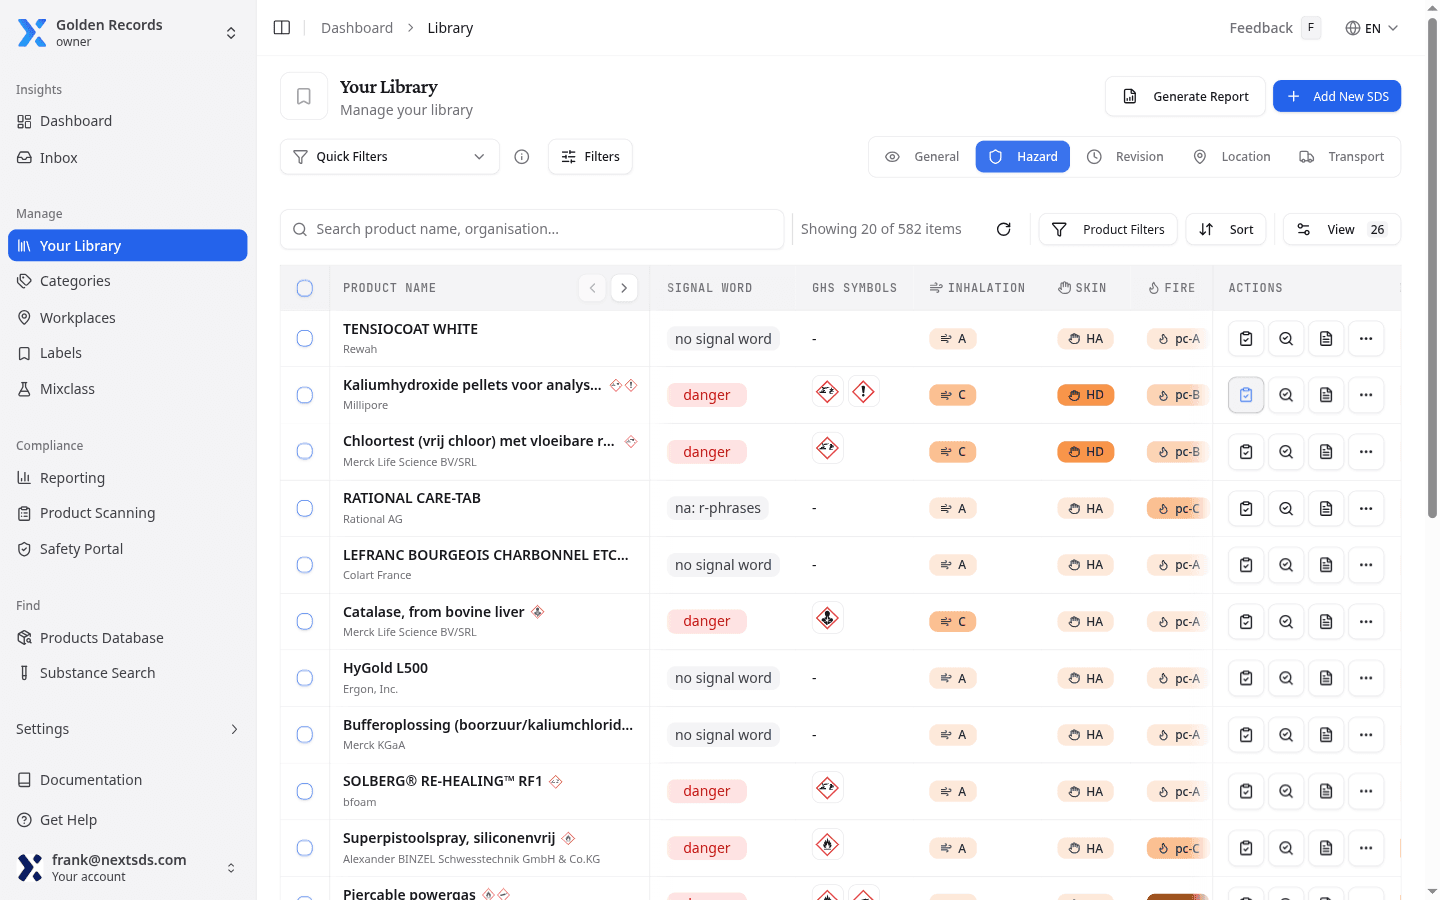
Change the visible columns
Five view buttons above the table change which columns are visible:
| View | Shows |
|---|---|
| General | Product name, status, supplier, labels, countries, last updated, hazard level indicator |
| Hazard | Signal word, GHS pictograms, EMKG groups (A = lowest risk through E = highest), CMR and sensitising status, hazard level indicator |
| Revision | Issue date, revision date, document quality score |
| Location | Workplace assignments and EMKG storage classification |
| Transport | UN number, Kemler code, proper shipping name, packing group |
The hazard level indicator shows overall risk on a 1–5 scale. Hover over it to see the breakdown across Health, Environmental, and Safety sub-scores. A grey indicator means the product was enriched but no hazard level was found. No indicator means the product has not been enriched yet.
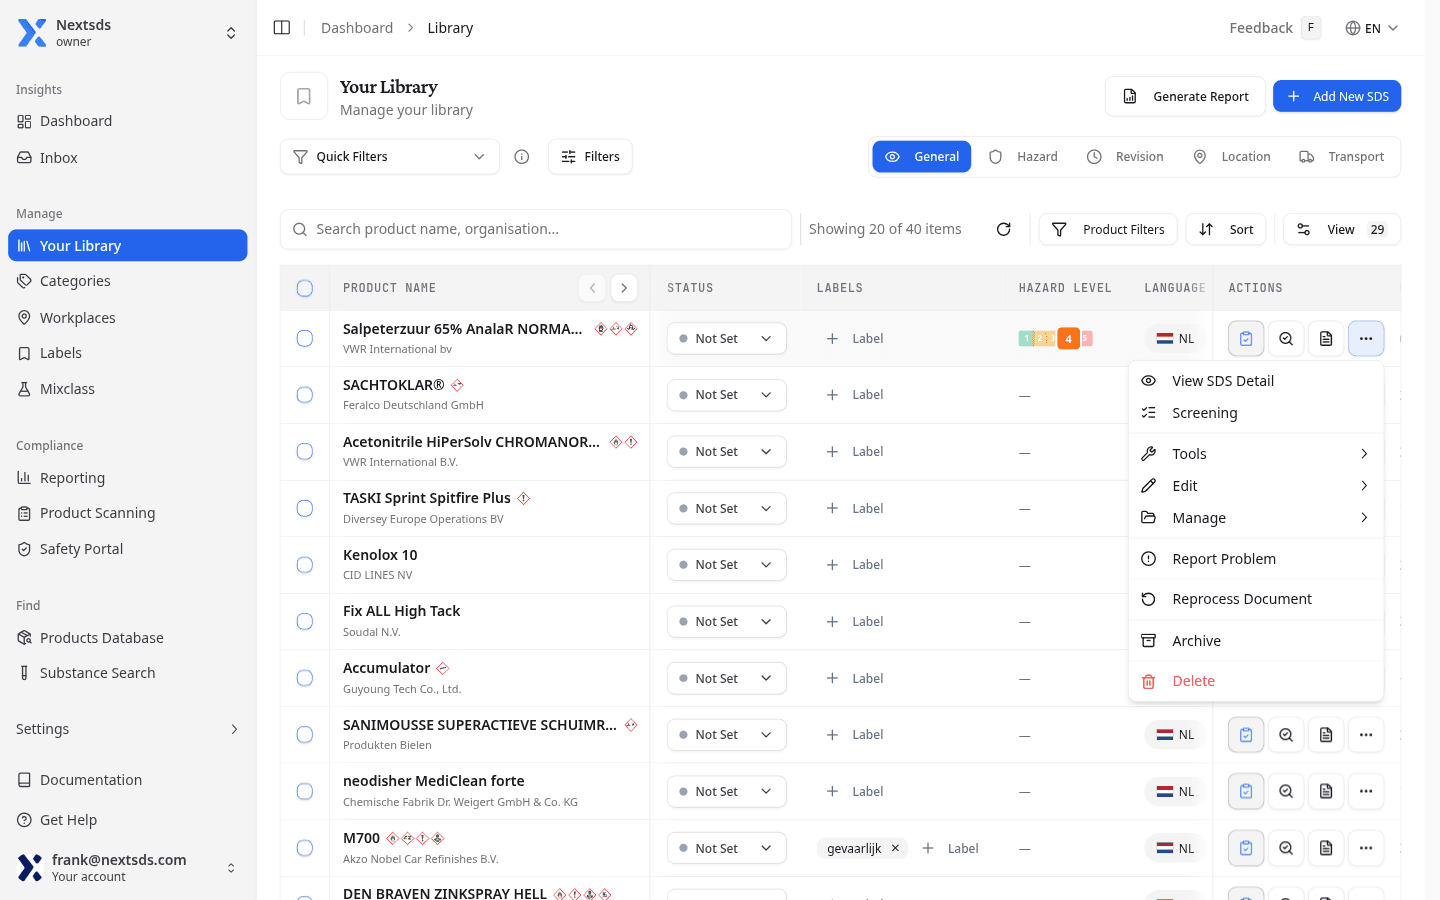
Manage a product
Each row has three quick-action buttons and an options menu.
The quick-action buttons are:
- Safety Instruction Card (hard hat icon): open the Safety Instruction Card wizard
- Quick Response (lightning icon): view a quick summary of the product's key safety data
- View PDF (document icon): open the original SDS document
Select the options menu for more actions. The top-level items are:
- View SDS Detail: open the full SDS record
- Screening: run a procurement screening across regulatory, safety, and environmental criteria
Below those, three submenus group related actions:
Tools
- Create CLP Label: generate a CLP-compliant label
- Request Update: ask for a fresh SDS from the supplier
- Simulate Exposure: model workplace exposure scenarios
- Risk Assessment (EMKG): assess inhalation, skin, and fire risk
Edit

- Edit SKU: update your internal product code
- Edit EAN: update the product's barcode number
- Edit Alternate Name: update the display name
- Manage Revisions: view the document's version history
Manage
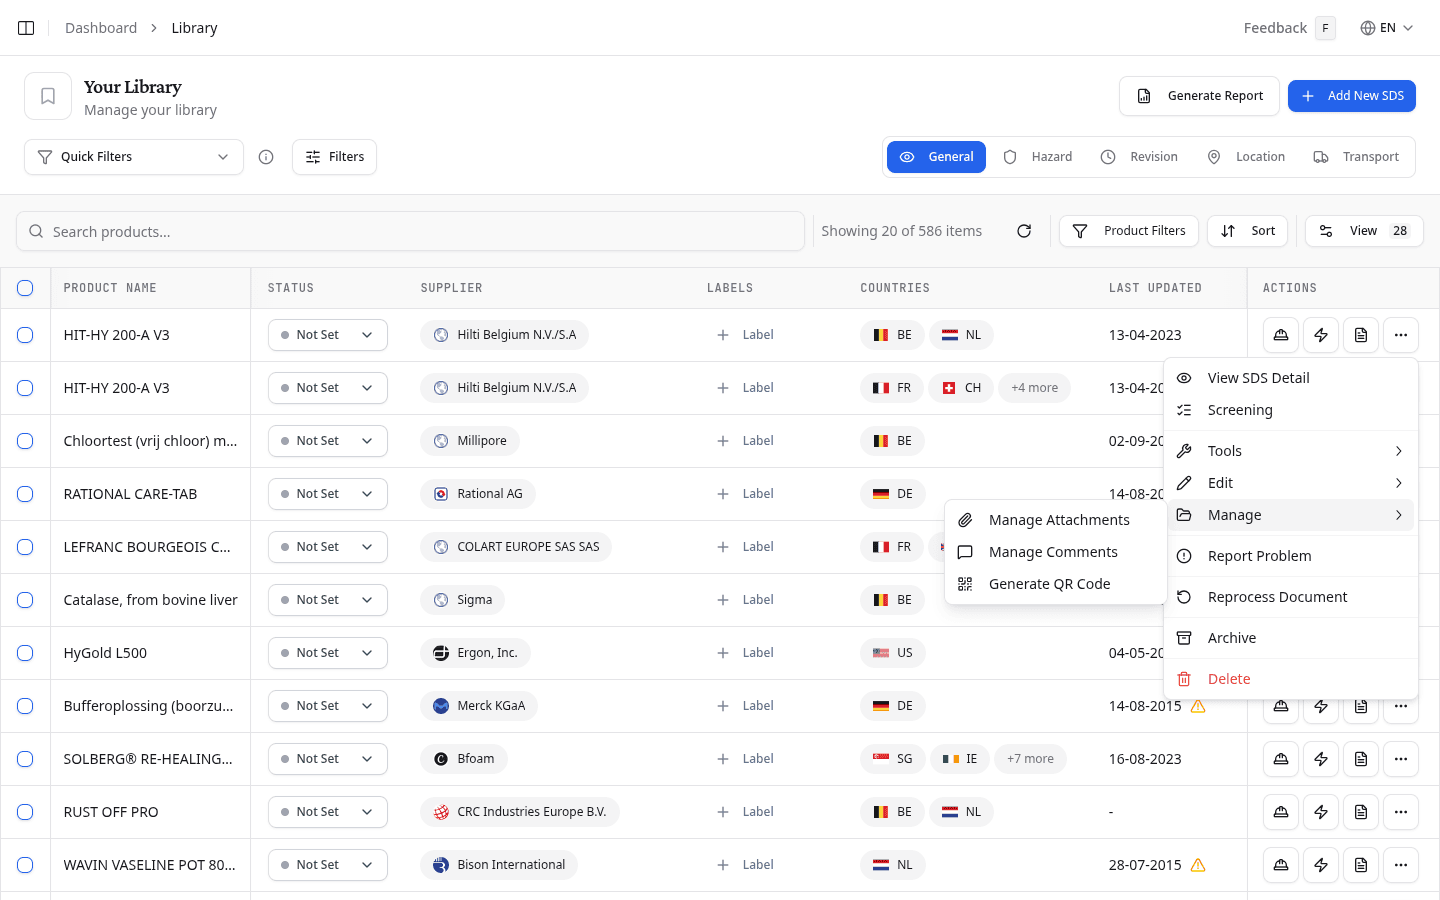
- Manage Attachments: add or remove file attachments
- Manage Comments: view and add notes
- Manage Metadata: view and edit structured metadata
- Generate QR Code: create a QR code linking to this product
The menu also includes:
- Report Problem: flag an issue with the document
- Archive: hide the product from the active list (use the Status filter to find archived items later)
- Delete: permanently remove the product
Deleting a product removes it and its SDS data permanently. Archive it instead if you may need it for future audits.
Scroll wide tables
When a view has more columns than fit on screen, scroll controls appear in the table header. Use the left and right arrow buttons to scroll the table sideways. The product name column stays pinned.
Check upload progress
After uploading one or more SDS documents, a notification appears showing how many files were uploaded and how many processing tasks are active. You can continue working while the AI extraction runs.
Export your library
Select the export button in the table toolbar to download the current filtered view as a spreadsheet. The export reflects whichever filters and view you have active.
Apply actions to several products at once
Select products using the checkboxes in the first column. A toolbar appears at the bottom of the screen with options to add the selected products to a workplace or delete them.
Screen a product for procurement
Before approving a new chemical for use, select Screening from the options menu to run a 3 Green Lights check. The panel screens the product across three criteria and shows a coloured dot (green = Pass, amber = Review, red = Fail) for each.
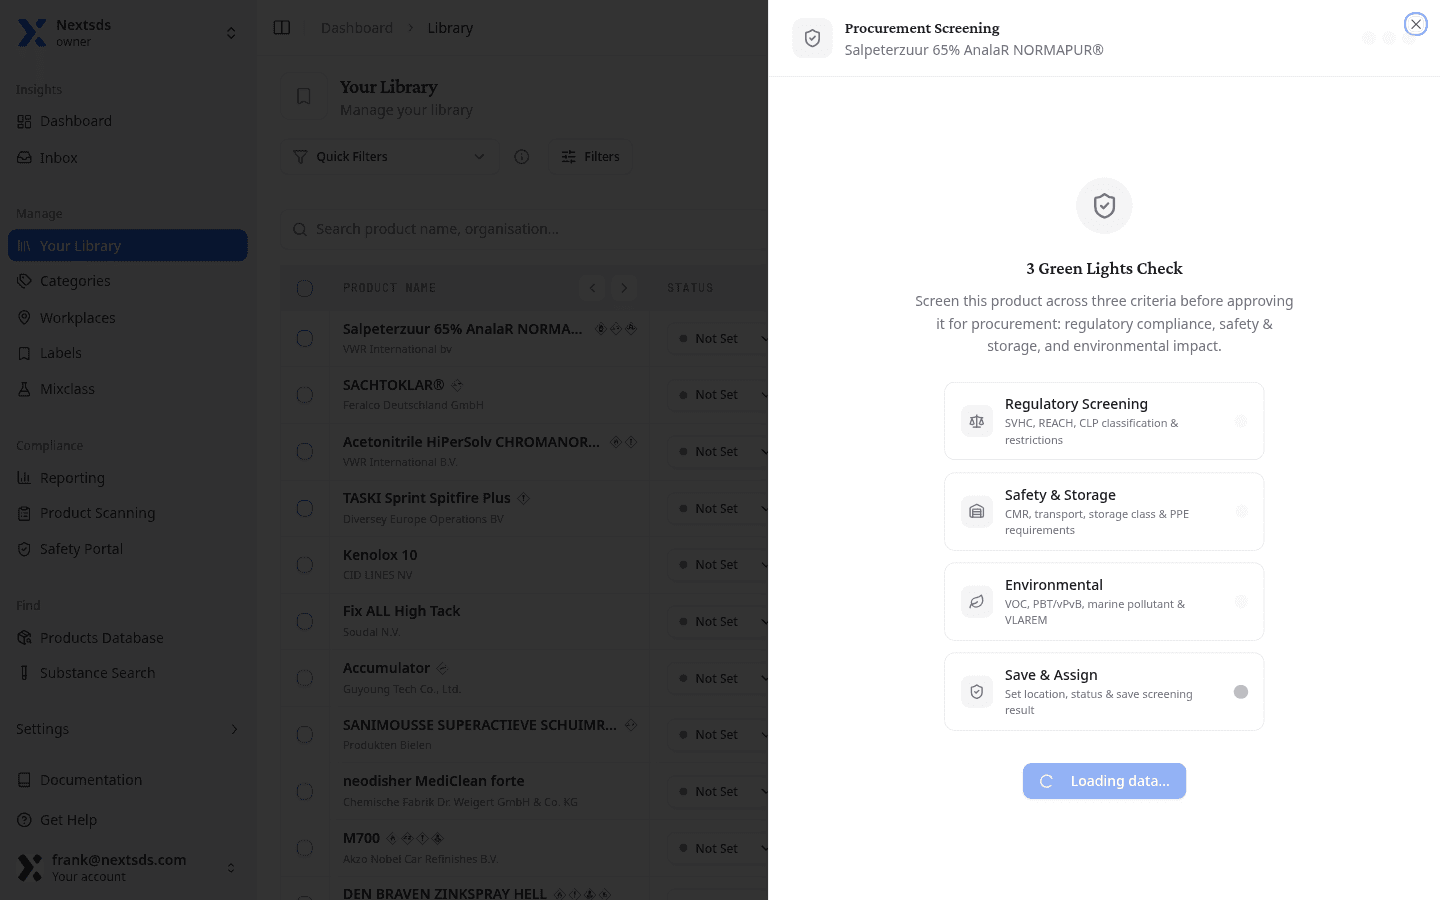
Select Start Screening to step through the assessment.
Step 1: Regulatory Screening
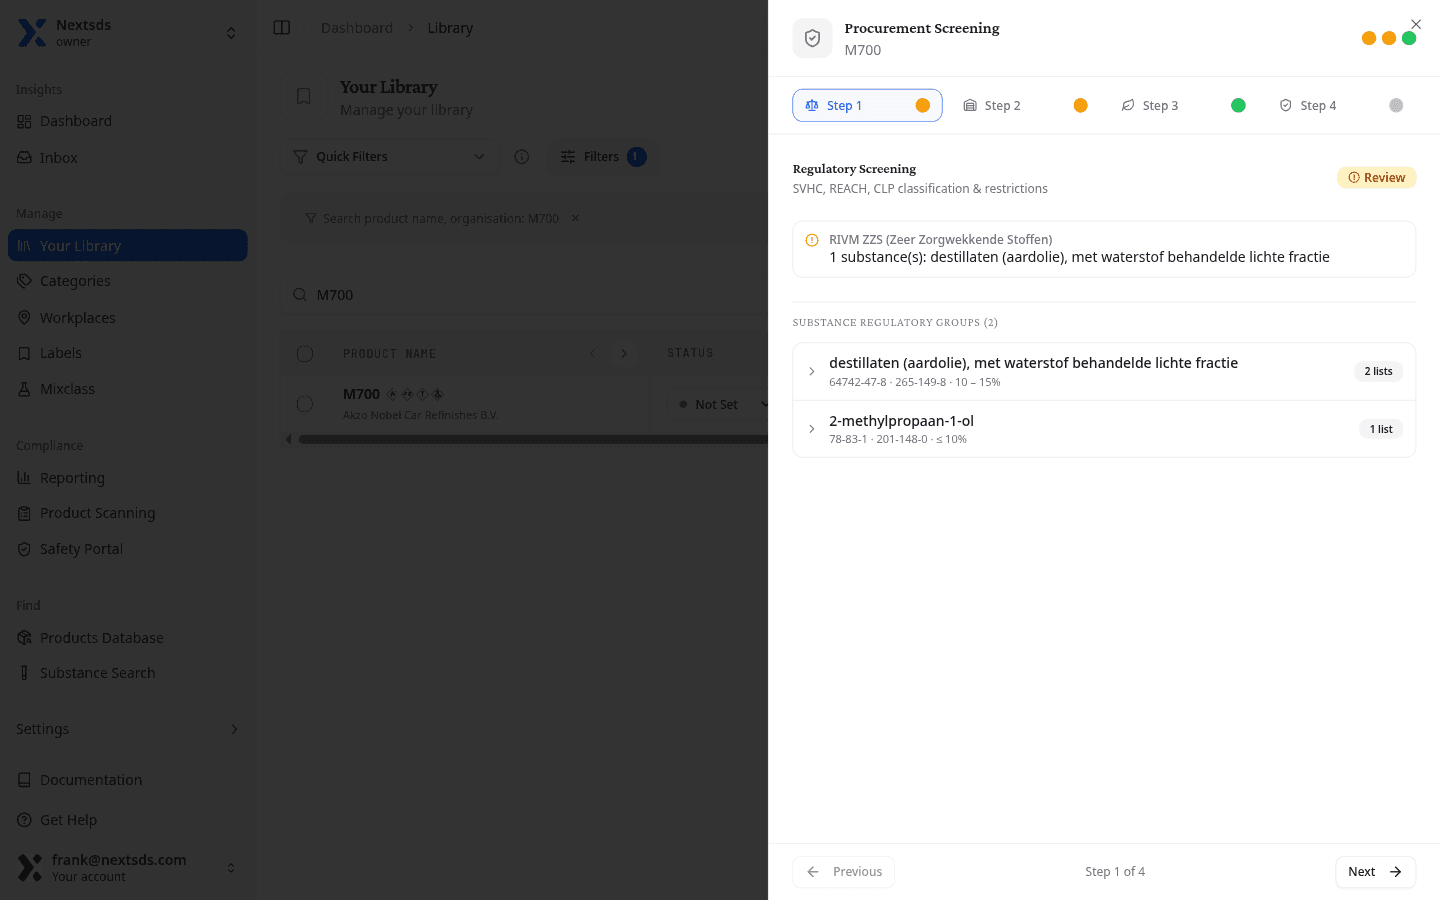
Cross-references each component substance against regulatory databases: the SVHC Candidate List, REACH Authorisation and Restriction Lists, POPs, and other concern lists (diisocyanates, endocrine disruptors, Prop 65). Each matched list is shown with its severity (red = action required, amber = review needed).
When the SDS contains Section 15 regulatory declarations from the supplier, these appear in a separate Section 15 — Regulatory Information section below the database results. This may include SVHC substances, Seveso classifications, national regulations, precursor substances, VOC information, and international agreements. Keeping both sources visible lets you compare what the supplier declared against what the database screening found.
Step 2: Safety and Storage
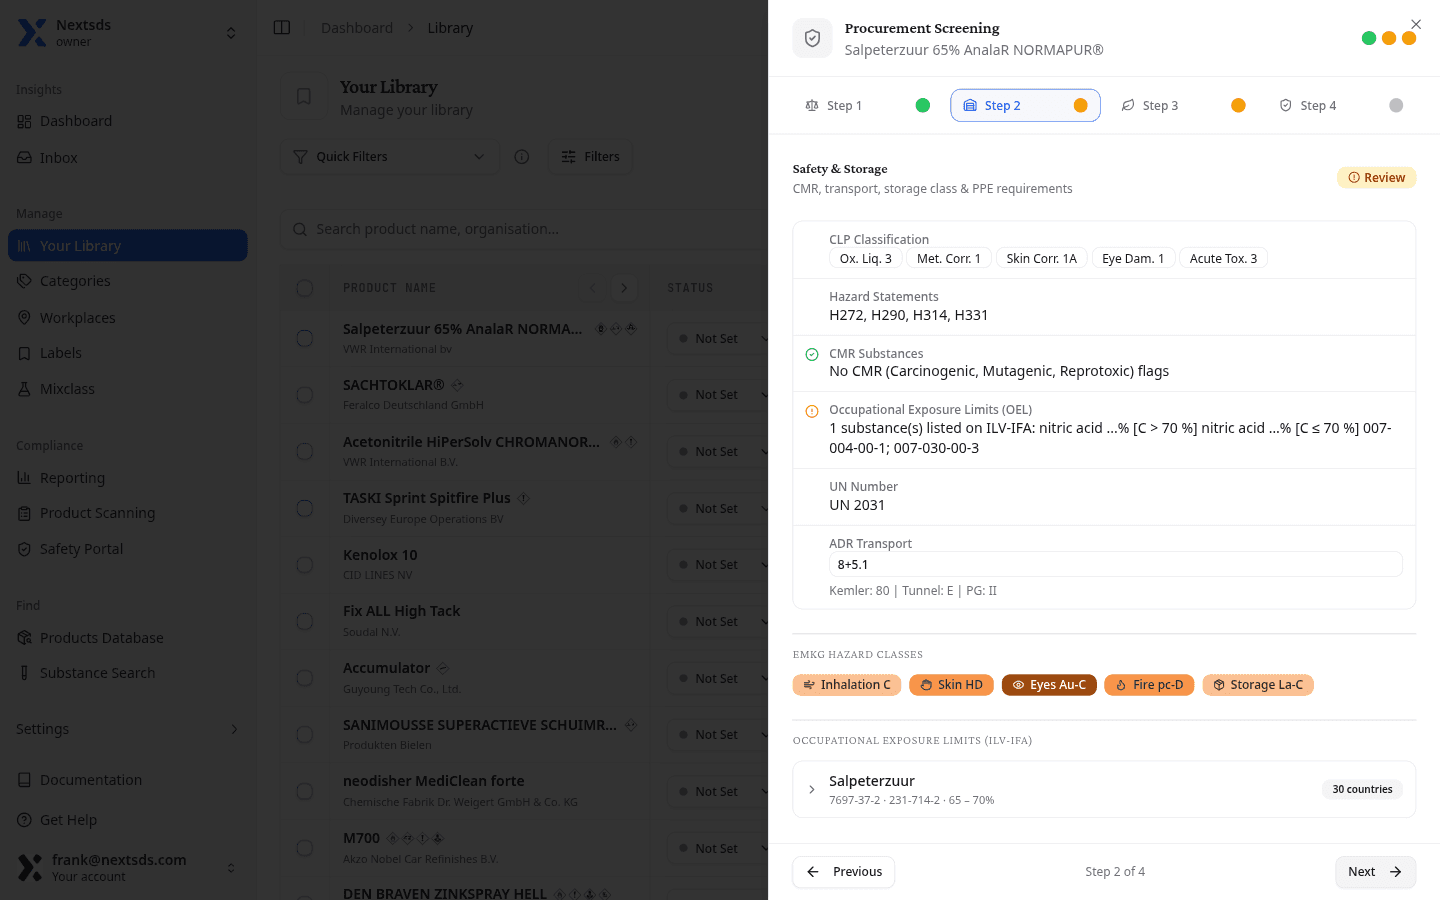
Shows the CLP classification as badge tags, CMR status (Carcinogenic, Mutagenic, or Reprotoxic substances are always flagged in red), ADR transport class with the standard diamond badge, storage class under TRGS 510, and occupational exposure limits from the ILV-IFA database. EMKG hazard classes for inhalation, skin, eyes, fire, and storage are shown where available.
Step 3: Environmental
Checks marine pollutant status (IMDG), VOC content, PBT/vPvB and endocrine disruptor assessments, PFAS identity, and VLAREM storage permit requirements. VLAREM permits are shown as badge tags with the Flemish regulation rubriek number.
Step 4: Save and assign
Set a procurement decision (Review, Accept, or Reject) and assign the product to one or more workplaces. Select Save and Close to store the result and update the product's status in the library.
What to do next
Once your library is populated, set up your workplace locations to track where each product is stored and used. This is the foundation for running risk assessments.